
Chocolate has traveled from ancient Mesoamerican rituals to modern snack trays, evolving from a ceremonial drink to a beloved confection. Over the centuries, its natural bitterness has been tempered by sweeteners, creating a balance that pleases the palate. In the last decade, protein powders have entered the snack world, offering a convenient way to boost nutrition without sacrificing flavor. This combination of timeless cocoa and contemporary protein creates a snack that feels both classic and current, appealing to busy families and fitness enthusiasts alike.
Why You'll Love It
-
- Simple, no‑bake preparation
-
- Rich chocolate flavor without excess sugar
-
- High protein keeps you energized
-
- Perfect for portable snacking
"These bliss balls are my go‑to afternoon pick‑me‑up – sweet, satisfying, and surprisingly filling."
Essential Ingredient Guide
- Chocolate protein powder: Choose a high‑quality, low‑sugar blend for the best texture and flavor.
- Rolled oats: Provides a gentle chew and helps bind the balls; old‑fashioned works best.
- Almond butter: Adds creaminess and healthy fats; stir until smooth.
- Cocoa powder: Use unsweetened Dutch‑process for deep, earthy notes.
- Honey: A natural sweetener that also aids binding; adjust to taste.
- Sea salt: A pinch brightens the chocolate and balances sweetness.
 Lunch
Lunch
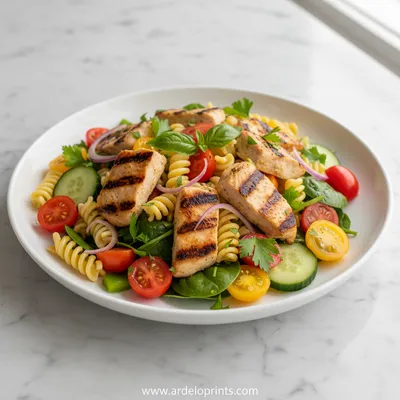
Mediterranean Chicken Pasta Salad
Light and flavorful Mediterranean chicken pasta salad with fresh herbs, veggies, and a zesty vinaigrette.
Complete Cooking Process
-
Ingredient Readiness:
Measure and sift dry ingredients, warm the almond butter gently, and have honey within reach.
-
Flavor Development:
Combine cocoa, protein powder, and oats, then stir in almond butter and honey until a cohesive dough forms.
-
Texture Control:
If the mixture feels sticky, add a splash of oat milk; if too dry, drizzle a bit more honey.
-
Finishing Touches:
Roll into bite‑size spheres, then coat lightly with cocoa powder or shredded coconut.
-
Serving Timing:
Let the balls chill for at least 20 minutes; they firm up beautifully once cooled.
-
Use a cookie scoop for uniform size.
-
Store in a single layer before refrigerating to avoid sticking.
-
Add a pinch of espresso powder for a subtle mocha lift.
-
Swap honey for maple syrup for a different sweet nuance.
Pro Tips
These little tricks help you keep consistency across batches. I often find that a quiet moment while coaxing the almond butter into a silky melt makes the whole process feel like a gentle ritual, not a race. Once chilled, the bliss balls keep their shape and stay delightfully chewy for days.
 Snacks
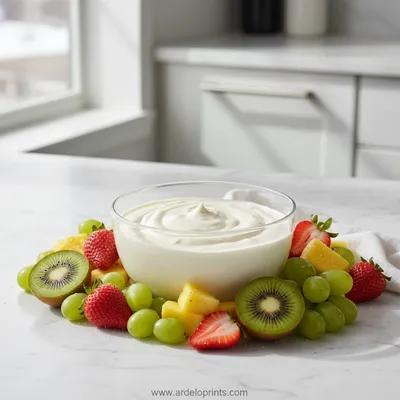
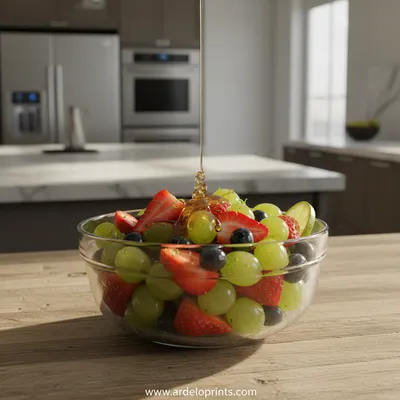
Easy Fruit Dip Recipe
Creamy, easy fruit dip for fresh fruit, perfect for any snack or dessert.
The essence of the dish:
A harmony of cocoa, protein, and natural sweetness that feels both indulgent and nourishing.
A fun fact or historical angle:
Chocolate was first cultivated by the Olmecs around 1500 BC and was once used as currency.
Flavor or sensory focus:
Expect a smooth, velvety bite with a whisper of honey, followed by the comforting warmth of cocoa.
You Must Know
-
Keep the mixture cool while shaping.
-
Do not over‑mix; gentle folding retains texture.
-
Seal the storage container tightly.
Frequently Asked Questions
→ Can I use whey protein instead of plant‑based?
Yes, whey works well; just ensure it’s unflavored to keep the chocolate taste front and center.
→ How long do they keep in the refrigerator?
Store in an airtight container for up to a week; they stay soft and flavorful.
→ Are they freezer‑friendly?
Absolutely, freeze for up to three months and thaw briefly before serving.
→ Can I make them gluten‑free?
Swap rolled oats for certified gluten‑free oats or ground almonds.
→ What if I don’t have almond butter?
Peanut butter or cashew butter are good alternatives; just note the flavor shift.
→ Do I need to bake them?
No baking required—just chill to set the texture.
Nutrition Facts
per serving
150
Calories
8g
Protein
15g
Carbs
8g
Fat
Taste Profile
Rich chocolate with a gentle sweet finish
Ingredient Substitutions
Don't have an ingredient? Try these alternatives
Flavor will shift slightly; choose unsweetened varieties.
Adjust quantity to maintain binding consistency.
Recipe Variations
Try these delicious twists on the original
Spicy Version
Add a pinch of cayenne pepper and a drizzle of dark chocolate for a subtle heat.
Mediterranean Style
Mix in chopped dried apricots and a sprinkle of toasted sesame seeds.
Common Mistakes to Avoid
Learn from others' mistakes for perfect results
- Over‑mixing the dough, which can make balls tough.
- Using too much cocoa powder, resulting in dry balls.
- Skipping the chilling step, leading to sticky surfaces.
Meal Prep & Storage
Make Ahead Tips
You can blend the base mixture and refrigerate it for up to 24 hours; shape the balls right before serving for maximum freshness.
Leftover Ideas
Reheat gently in a microwave for 10 seconds if you prefer a softer texture, or enjoy straight from the fridge.
Perfect Pairings
Serve this with...
Cooking Timeline
Gather and measure all ingredients; sift dry components.
Warm almond butter and honey; combine with dry mix.
Mix until dough forms; adjust texture if needed.
Roll into balls, coat, and place on tray; chill.
Allow to set, then transfer to storage container.
 Breakfast
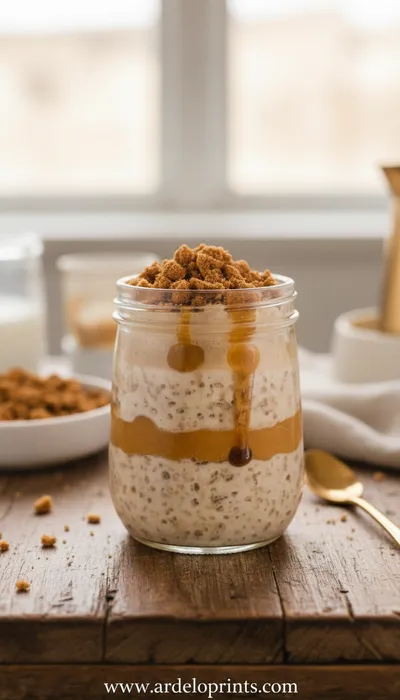
Pumpkin Cheesecake Overnight Oats for Cozy Mornings
Creamy pumpkin-spiced overnight oats with cheesecake flavor - a cozy make-ahead breakfast.
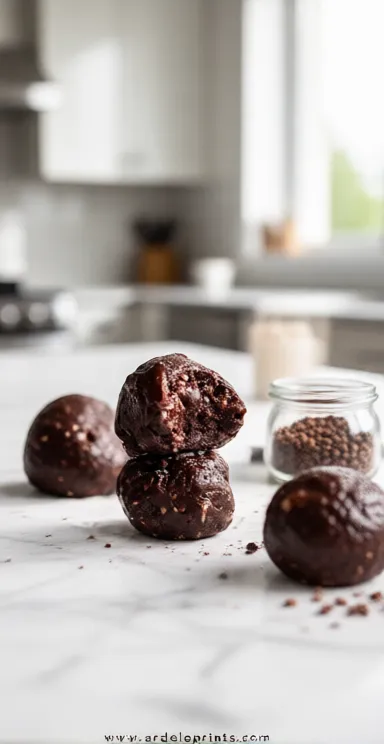
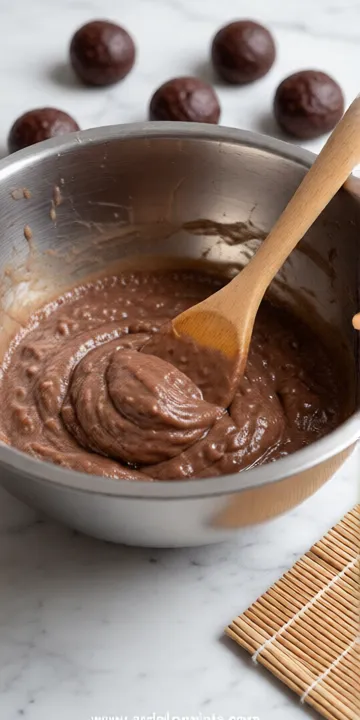
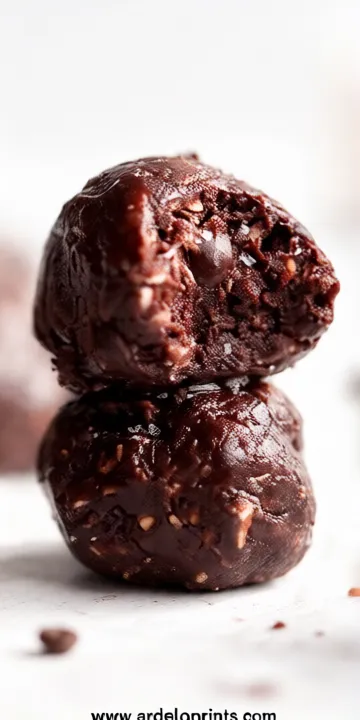
Chocolate Protein Bliss Balls
A quick, nutritious snack that feels like a tiny chocolate hug. These chocolate protein bliss balls are packed with cocoa richness, a hint of honey, and a protein boost that keeps you steady through the afternoon. Honestly, they’re perfect for a desk drawer or a kitchen counter. For a twist, try mint chips.
Timing
Prep Time
15 Minutes
Cook Time
0 Minutes
Total Time
35 Minutes
Recipe Details
Ingredients
Base Mix
-
01
1 cup rolled oats
-
02
1/2 cup chocolate protein powder
-
03
1/4 cup unsweetened cocoa powder
-
04
1/3 cup almond butter
-
05
1/4 cup honey
-
06
2 tbsp oat milk (optional)
-
07
Pinch of sea salt
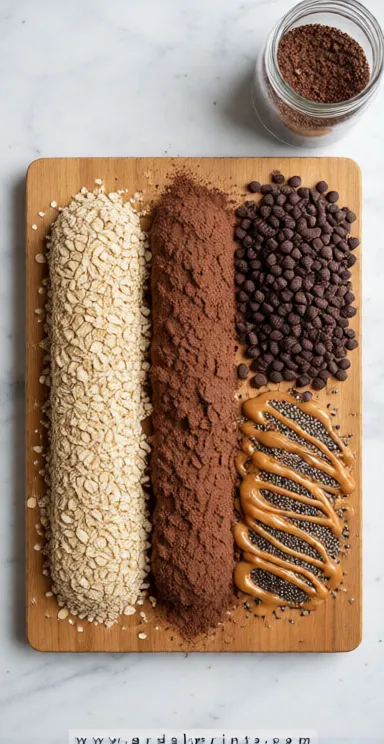
Coating Options
-
01
2 tbsp cocoa powder
-
02
2 tbsp shredded coconut
-
03
1 tbsp finely chopped nuts
Instructions
In a large bowl, combine rolled oats, chocolate protein powder, cocoa powder, and sea salt; stir until evenly mixed.
Warm almond butter and honey in a microwave‑safe bowl for 20‑30 seconds, then whisk together until smooth.
Pour the warm almond‑honey mixture into the dry ingredients, adding oat milk if needed, and mix until a sticky dough forms.
Scoop about one tablespoon of dough, roll between palms into a ball, then coat in your chosen coating (cocoa, coconut, or nuts). Place on a parchment‑lined tray and chill for at least 20 minutes.
Once set, transfer the bliss balls to an airtight container and store in the refrigerator.
Notes & Tips
-
1
If the mixture feels too dry, add a teaspoon of warm water or more honey.
-
2
For a nut‑free version, use sunflower seed butter.
-
3
Feel free to add a dash of vanilla extract for extra aroma.
Tools You'll Need
-
Large mixing bowl
-
Measuring cups and spoons
-
Microwave‑safe bowl
-
Silicone spatula
-
Cookie scoop or tablespoon
-
Parchment paper
Must-Know Tips
-
Don’t over‑mix; gentle folding keeps the texture tender.
-
Chill the balls promptly to prevent them from sticking together.
-
Taste the mixture before shaping; adjust sweetness if needed.
Professional Secrets
-
Warm the nut butter just enough to melt, not boil, for a glossy finish.
-
Sift cocoa and protein powder to avoid lumps.
-
Use a light hand when rolling to keep the interior airy.

Recipe by
Lily_HarperFrom crispy bites to soft nibbles, I’m all about snack-time happiness made simple and delicious.
Get Delicious Recipes Weekly
Join 25,000+ home cooks getting our best recipes straight to their inbox.
Free forever • No spam • Unsubscribe anytime