
I remember the first time I tried to make these. It was one of those hectic Tuesdays, you know the kind. The kitchen was a bit of a mess, and I just needed something simple and satisfying. Pulling these golden-brown parcels out of the oven, the smell of toasted tortillas and warm spices filling the air... it felt like a small, quiet victory. It's become our go-to for those evenings when time is short but we still crave something that feels special and put-together.
Why This Recipe Feels Like a Hug
-
It's so incredibly fast, a true 30-minute meal for those busy nights.
-
Baking instead of frying makes them feel a little lighter, and honestly, the cleanup is a dream.
-
The filling is completely customizable. Sometimes I'll add leftover corn or black beans.
-
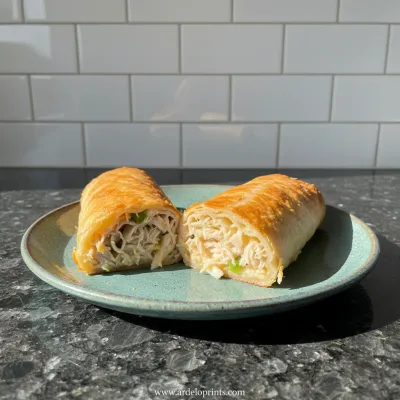
That moment when you cut into the crispy shell to reveal the melty, cheesy center... wow.
Honestly, I was surprised by how incredible these baked chimichangas are. They have that perfect crisp on the outside and are so warm and cheesy inside. My family asks for them constantly now!
Essential Ingredient Guide
- Cooked Chicken: Honestly, a rotisserie chicken is my secret weapon here. It saves so much time and is always perfectly seasoned and juicy. Leftover grilled chicken works beautifully too.
- Large Flour Tortillas: You'll want the 'burrito size' ones, about 10 inches. Warming them up for a few seconds in the microwave makes them so much more pliable and less likely to tear when you're rolling.
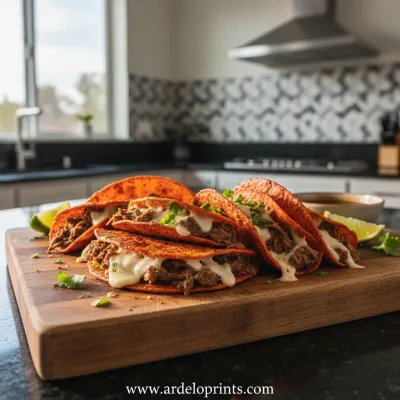
Birria Tacos: Easy & Flavorful Recipe
Tender, slow-braised beef tacos pan-fried to perfection with a rich, savory consomé for dipping.
Complete Cooking Process
-
The Rhythm of Making Chimichangas:
-
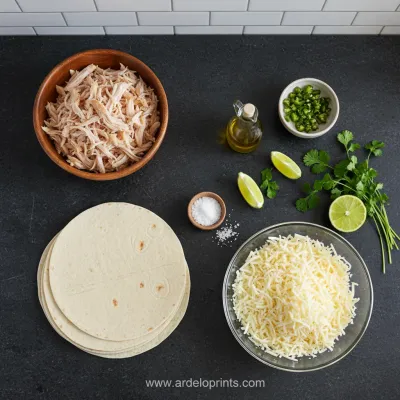
First, the quiet prep: mixing the warm, spiced chicken and cheese in a bowl. It already smells like dinner is going to be good.
-
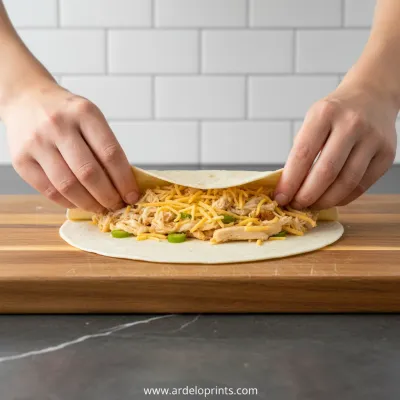
Next, the gentle art of rolling. Don't worry if they're not perfect. Mine never are. Just tuck the sides in and roll it up like a cozy blanket.
-
Then, brushing them with a little oil. I love this part. It’s like painting them, getting them ready for their golden transformation in the oven.
-
Finally, watching them bake. The kitchen fills with that toasty, savory aroma, and you just know everyone is going to be happy.
-
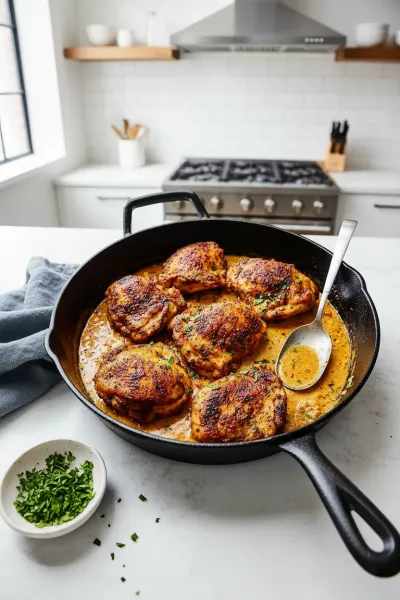
Easy Skillet Chicken Thighs Recipe
Garlic cream sauce skillet chicken thighs for a delicious and simple weeknight dinner.
A Few Things You Might Be Wondering
→ Can I make these ahead of time?
You can! I'd assemble them completely but wait to bake them. Just cover them tightly in the fridge for up to a day. You might need to add a few extra minutes to the baking time when you're ready.
→ What other fillings can I use?
Oh, so many things! Shredded beef, ground beef, or even just black beans and corn for a vegetarian version would be lovely.
→ Are these really crispy like the fried kind?
They get a wonderful golden-brown crispness, especially on top. It's not quite the same texture as deep-frying, but it's a delicious, slightly softer crunch that I've really come to prefer at home.
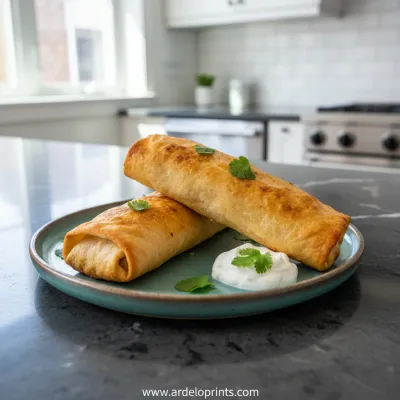
Easy Chicken Chimichanga Recipe
An easy 30-minute chicken chimichanga recipe! A delicious baked burrito filled with chicken and cheese. Perfect for a quick meal.
Timing
Prep Time
15 minutes
Cook Time
15 minutes
Total Time
30 minutes
Recipe Details
Ingredients
For the Chicken Filling
-
01
2 cups cooked, shredded chicken (a rotisserie chicken is perfect for this)
-
02
1 cup shredded Mexican cheese blend
-
03
1/2 cup of your favorite salsa
-
04
1 teaspoon chili powder
-
05
1/2 teaspoon ground cumin
-
06
1/4 teaspoon garlic powder
For Assembly
-
01
4 large (10-inch) flour tortillas
-
02
2 tablespoons olive oil or melted butter
Optional Toppings
-
01
Sour cream or Greek yogurt
-
02
Guacamole or sliced avocado
-
03
Chopped fresh cilantro
-
04
Extra salsa for dipping
Instructions
First, let's get the oven going. Preheat it to 400°F (200°C). While it warms up, find a medium bowl and gently mix together the shredded chicken, cheese, salsa, and all those lovely spices. Just stir until everything is nicely combined. The aroma is already so promising.
Now for the tortillas. I like to warm them just a little to make them soft and pliable. You can wrap them in a damp paper towel and microwave for about 20-30 seconds. It makes them so much easier to roll without any oops-moments.
Lay a warm tortilla on a clean surface. Spoon about a quarter of the chicken mixture into the center. Don't overfill! Fold in the sides first, then roll it up snugly from the bottom, like a little burrito.
Place each chimichanga seam-side down on a baking sheet. This is the little trick to keeping them from unrolling. Now, gently brush the tops and sides with the olive oil or melted butter. This is what helps them get that beautiful golden, crispy finish.
Bake for 12-15 minutes, or until they're golden brown and crisped to your liking. The cheese should be perfectly melty inside. Let them cool for just a minute before serving them warm with all your favorite toppings.
Notes & Tips
-
1
Feel free to add a can of drained black beans or some corn to the chicken mixture for extra texture and fiber.
-
2
If you like a little heat, a pinch of cayenne pepper or some chopped jalapeños in the filling is wonderful.
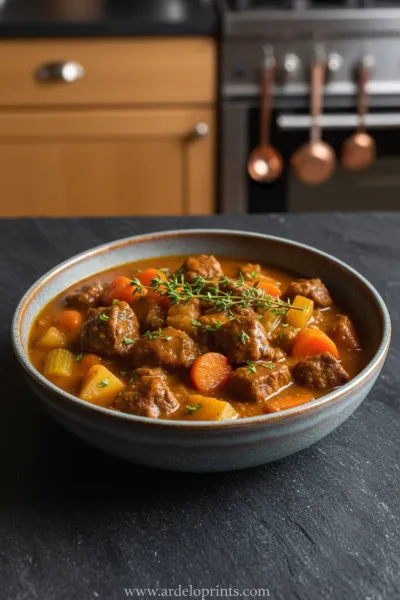
Easy Slow Cooker Pot Roast
The ultimate set-it-and-forget-it meal. Tender beef and hearty vegetables simmered to perfection in the slow cooker.
Tools You'll Need
-
Baking Sheet
-
Mixing Bowl
-
Pastry Brush (or just your fingers!)
-
Measuring Cups and Spoons
Must-Know Tips
-
Don't overfill the tortillas! It's tempting, I know, but a little less filling makes them much easier to roll without bursting.
-
Placing them seam-side down on the baking sheet is key to making sure they hold their shape and don't unroll in the oven.
Professional Secrets
-
For an extra layer of flavor, stir a spoonful of cream cheese into the chicken mixture. It makes the filling incredibly creamy and rich.
-
A final sprinkle of coarse sea salt over the top right before baking gives a little extra crunch and flavor that is just so good.

Recipe by
Sofia Marin“Dinner is where stories are shared and flavors shine. I craft comforting recipes perfect for family nights.” 🍷🍲
Get Delicious Recipes Weekly
Join 25,000+ home cooks getting our best recipes straight to their inbox.
Free forever • No spam • Unsubscribe anytime