Originating from the health‑focused breakfast trends of the early 2000s, oat‑based cups quickly became a staple for athletes and busy families alike. Their popularity grew as kitchens embraced quick, portable nutrition, merging the comforting texture of baked oatmeal with the protein punch of modern diets. This recipe captures that blend of tradition and convenience, offering a timeless, hearty start to the day.
Why You'll Love It
-
- Ready in under 30 minutes, perfect for busy mornings
-
- Packed with protein from powder and peanut butter
-
- Naturally sweetened with honey and ripe bananas
-
- Freezer‑friendly; make a batch and grab whenever
"These cups are my new go‑to; they’re soft, flavorful, and keep me full all morning."
Essential Ingredient Guide
- Rolled oats: Provides heart‑healthy fiber; choose thick‑cut for a chewier bite
- Peanut butter: Adds creamy richness; stir well to avoid oil separation
- Vanilla protein powder: Boosts protein; pick a low‑sugar blend for best texture
- Honey: Gentle sweetener; drizzles in a floral note that balances the nutty flavor
- Greek yogurt: Adds moisture and a subtle tang; use full‑fat for creamier cups
- Ground cinnamon: Warm spice that ties the flavors together
 Dinner
Creamy Low Carb Chicken Casserole
Low‑carb, creamy chicken casserole that feels indulgent without the noodles.
Complete Cooking Process
-
Ingredient Readiness:
Measure oats, scoop peanut butter, and whisk protein powder with milk until smooth.
-
Flavor Development:
Toast oats briefly in the pan; this deepens their nutty aroma.
-
Texture Control:
Fold in yogurt and honey; the mixture should be thick yet pourable.
-
Finishing Touches:
Stir in cinnamon and a pinch of salt, then spoon into liners.
-
Serving Timing:
Cool slightly before enjoying warm, or store for a grab‑and‑go snack.
-
Add a pinch of sea salt to brighten the peanut butter flavor
-
Swap honey for maple syrup for a different sweet note
-
Top with sliced banana before baking for extra moisture
-
Freeze leftovers; reheat in microwave for 30 seconds
Pro Tips
Well, I’ve found that a little extra salt can really lift the nutty depth, especially if you’re using a natural peanut butter that’s a bit oily. Also, when I slice a banana on top before the oven, the fruit caramelizes just enough to give a tender crown. Finally, don’t forget the freezer tip – these cups keep beautifully for up to three days, making morning prep a breeze.
 Snacks
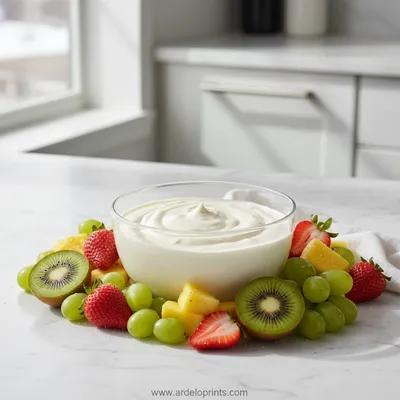
Easy Fruit Dip Recipe
Creamy, easy fruit dip for fresh fruit, perfect for any snack or dessert.
The essence of the dish:
A harmonious blend of toasted oats, creamy peanut butter, and a protein boost creates a cup that’s both filling and comforting.
A fun fact or historical angle:
Oatmeal cups rose to fame during the early 2010s as gym‑goers searched for portable, high‑protein breakfast options.
Flavor or sensory focus:
You’ll notice the gentle sweetness of honey, the earthy warmth of cinnamon, and the unmistakable nuttiness of peanut butter, all wrapped in a soft, slightly crunchy oat crust.
You Must Know
-
Cool the batter before filling liners to avoid splatter
-
Use silicone liners for easy release
-
Don’t overbake; 20 minutes preserves a moist interior
Frequently Asked Questions
→ Can I make these gluten‑free?
Yes, swap rolled oats for certified gluten‑free oats and ensure your protein powder is gluten‑free as well.
→ How long do they keep in the fridge?
Store in an airtight container for up to four days; reheat gently before serving.
→ What if I don’t have Greek yogurt?
Use plain low‑fat yogurt or a plant‑based alternative; the texture will be slightly lighter.
→ Can I add chocolate chips?
Absolutely—fold in a quarter cup of dark chocolate chips before baking for extra indulgence.
→ Is honey necessary?
Honey balances the flavors, but you can replace it with maple syrup or agave nectar if preferred.
→ How do I make them vegan?
Use a plant‑based protein powder, swap Greek yogurt for coconut yogurt, and choose maple syrup instead of honey.
Nutrition Facts
per serving
350
Calories
22g
Protein
38g
Carbs
14g
Fat
Taste Profile
Nutty and lightly sweet with a comforting warmth
Ingredient Substitutions
Don't have an ingredient? Try these alternatives
Provides a milder flavor; may need a touch more honey
Adds a subtle coconut note; choose unsweetened to control sugar
Recipe Variations
Try these delicious twists on the original
Spicy Version
Add 1/4 tsp cayenne and a dash of chili powder for a warm kick.
Mediterranean Style
Mix in chopped dried apricots and a sprinkle of toasted sesame seeds.
Common Mistakes to Avoid
Learn from others' mistakes for perfect results
- Leaving the batter too thick – leads to dense cups
- Overbaking – results in dry edges
- Skipping the cooling step – makes removal difficult
Meal Prep & Storage
Make Ahead Tips
You can prepare the batter the night before, refrigerate, and bake fresh in the morning for the fastest start.
Leftover Ideas
Reheat gently in a skillet with a splash of milk, or enjoy cold straight from the fridge.
Perfect Pairings
Serve this with...
Cooking Timeline
Preheat oven and line muffin tin; gather all ingredients
Simmer oats with milk until soft, then remove from heat
Stir in peanut butter, honey, yogurt, protein powder, and spices
Fill liners, add optional toppings, and bake
Cool slightly, release from liners, and serve or store
 Desserts
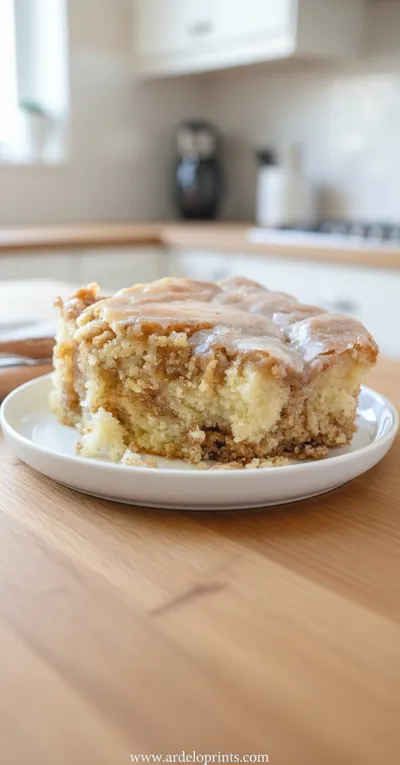
Cinnamon Roll Cake Recipe
Fluffy cinnamon roll cake with caramelized swirl, ideal for breakfast or snack.
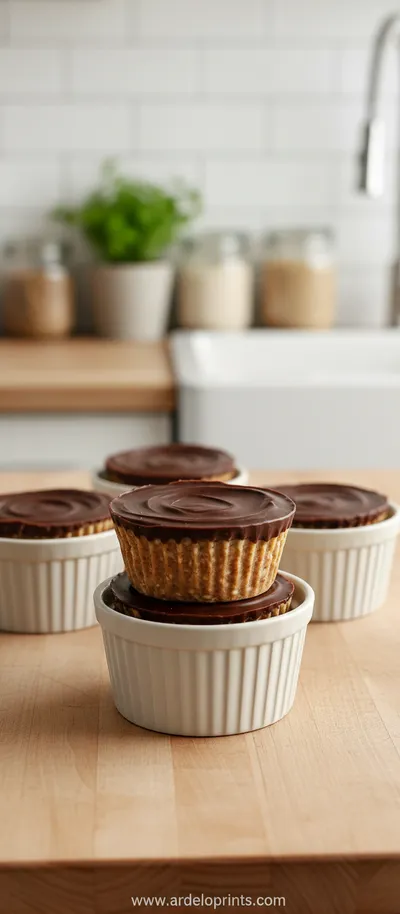
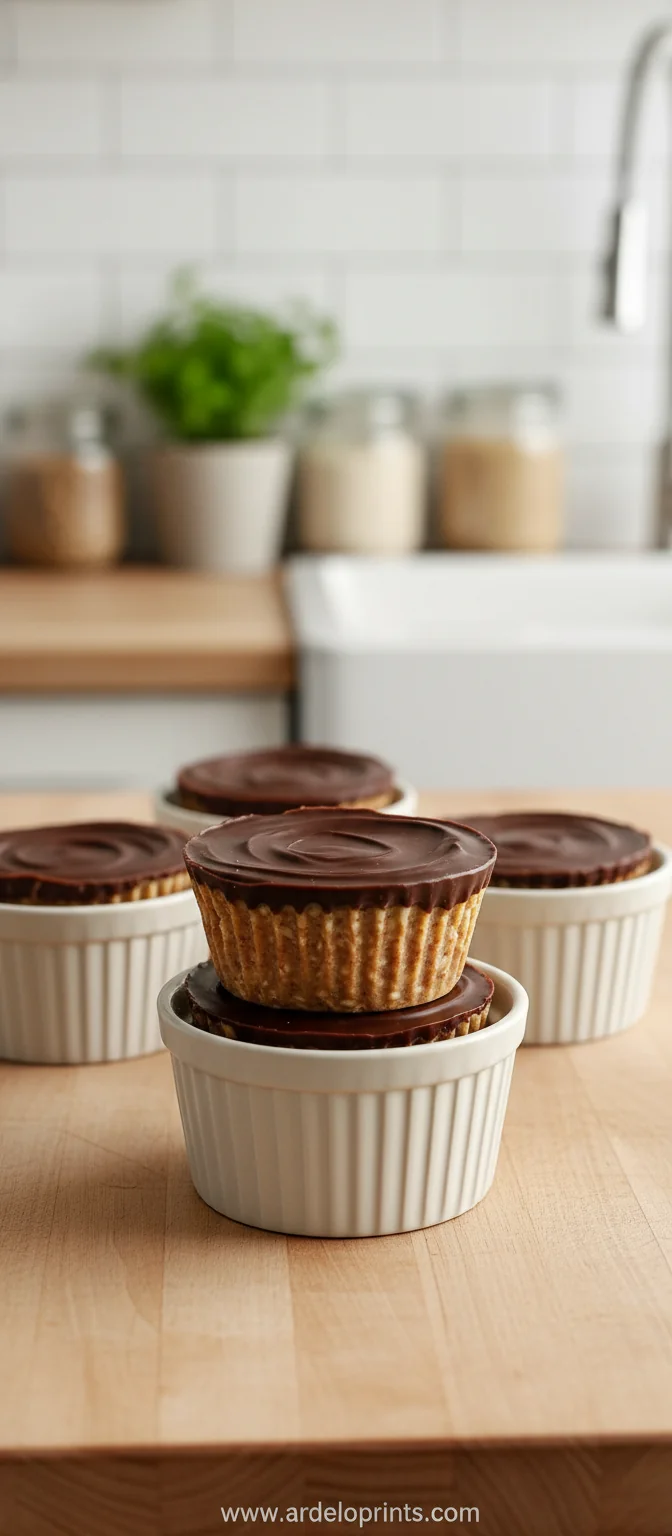
Easy Peanut Butter Protein Oatmeal Cups
These easy peanut butter protein oatmeal cups are a comforting, quick‑grab breakfast that feels like a warm hug. I love how the nutty aroma fills the kitchen as they bake, and you can even pair them with a dollop of energy bites for extra protein.
Timing
Prep Time
10 Minutes
Cook Time
20 Minutes
Total Time
30 Minutes
Recipe Details
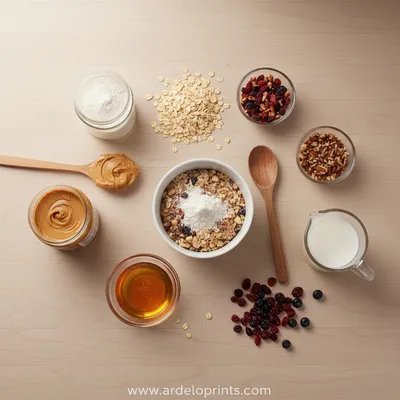
Ingredients
Main Ingredients
-
01
2 cups rolled oats
-
02
1/2 cup natural peanut butter
-
03
1 cup milk (dairy or plant‑based)
-
04
1/2 cup Greek yogurt
-
05
1/4 cup honey
-
06
1 scoop vanilla protein powder
-
07
1 tsp ground cinnamon
-
08
1/4 tsp salt
Optional Topping
-
01
Sliced banana
-
02
Chopped peanuts
-
03
Dark chocolate chips
Instructions
Preheat the oven to 350°F (175°C) and line a muffin tin with silicone liners.
In a saucepan, combine oats and milk; heat gently for 3‑4 minutes until the oats soften.
Remove from heat, stir in peanut butter, honey, Greek yogurt, protein powder, cinnamon, and salt until a thick batter forms.
Spoon the batter into the liners, about 3/4 full, and optionally top with banana slices or chocolate chips.
Bake for 18‑20 minutes, until the tops are lightly golden. Let cool for 5 minutes before removing.
Notes & Tips
-
1
If the batter feels too thick, add a splash more milk.
-
2
For extra crunch, sprinkle a pinch of toasted oats on top before baking.
-
3
These cups pair wonderfully with a cold glass of almond milk.
 Breakfast
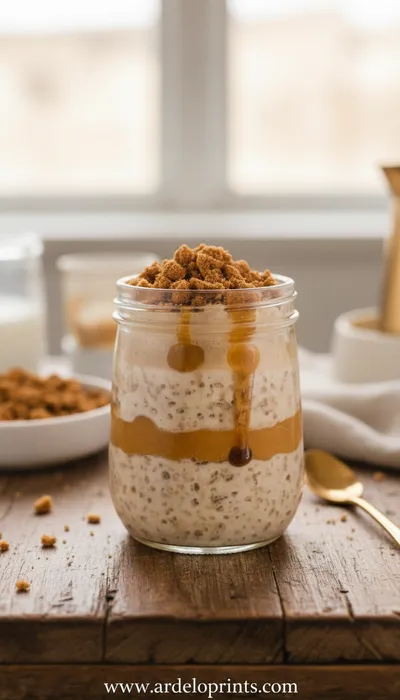
Pumpkin Cheesecake Overnight Oats for Cozy Mornings
Creamy pumpkin-spiced overnight oats with cheesecake flavor - a cozy make-ahead breakfast.
Tools You'll Need
-
Muffin tin
-
Silicone liners
-
Saucepan
-
Whisk
-
Mixing bowl
-
Measuring cups and spoons
Must-Know Tips
-
Don’t overmix the batter; it can become gummy
-
Allow the cups to cool slightly for easier removal
-
Store leftovers in a single layer to avoid sogginess
Professional Secrets
-
Toast oats briefly for deeper flavor
-
Use room‑temperature ingredients for even mixing
-
Bake on the middle rack for uniform heat

Recipe by
Emma Fields“Mornings are my magic hour! I create easy, energizing breakfasts that turn sleepy starts into sunshine moments.” ☀️🥞
Get Delicious Recipes Weekly
Join 25,000+ home cooks getting our best recipes straight to their inbox.
Free forever • No spam • Unsubscribe anytime