
The concept of enclosing savory fillings in dough spans cultures, from English pasties to Cornish pies. These cheeseburger bombs are a modern American twist on that tradition, transforming the familiar flavors of a classic burger into a portable, shareable appetizer. The combination of garlic and parmesan with seasoned beef creates a rich, umami-packed experience that has made these a popular party food across the country.
Why You'll Love It
-
Incredibly easy to make with simple ingredients
-
Perfect for parties, game days, or a quick family snack
-
The garlic parmesan butter topping is life-changing
-
Kids and adults alike go crazy for these warm, cheesy bites
My family devoured these in minutes! The garlic parmesan coating is absolutely addictive.
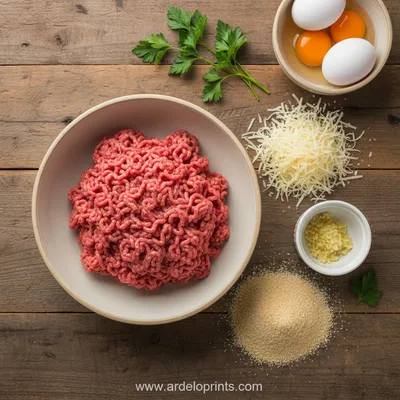
Essential Ingredient Guide
- Ground beef: I like to use an 85/15 blend for the best flavor and moisture. You want that good beefy taste to shine through, so don't go too lean. Honestly, it makes all the difference.
- Refrigerated biscuit dough: It's the shortcut that makes this recipe so approachable. The dough puffs up beautifully around the filling. Let it sit out for a few minutes before handling - cold dough is so much harder to work with.
- Mozzarella cheese: The stringy, melty quality is just perfect here. I cut it into small cubes so it distributes evenly. When that cheese pulls apart as you bite in... oh, wow.
- Garlic: Freshly minced garlic in the butter sauce gives that authentic, aromatic punch. Don't be shy with it - the flavor mellows as it bakes.
- Parmesan cheese: The salty, nutty flavor in the butter coating creates that golden crust. I like to use freshly grated for the best texture.
- Worcestershire sauce: Just a splash deepens the beef flavor so much. It's that little secret that makes people wonder what's in there.
 Desserts
Blueberry Cheesecake Cookies
Buttery cookies with a tender blueberry cheesecake centre, ideal for a cozy treat.
Complete Cooking Process
-
Ingredient Readiness:
Having everything prepped before you start is key. The beef should be browned and cooled slightly so it doesn't melt the cheese instantly. The biscuits need to be separated and ready to stretch. I mean, it just makes the assembly so much smoother when you're not scrambling.
-
Flavor Development:
The real magic happens when you brush on that garlic parmesan butter. As it bakes, it soaks into the biscuit dough and creates this incredible crust. The smell that fills your kitchen is just... well, it's pure comfort.
-
Texture Control:
You want to seal those edges well so the cheese doesn't escape. A little pinch and twist does the trick. And don't overcrowd the pan - they need space to puff up and get that beautiful golden color all around.
-
Finishing Touches:
That final brush of butter right when they come out of the oven gives them a lovely sheen and an extra hit of garlic flavor. It's the perfect little touch.
-
Serving Timing:
These are best served warm, when the cheese is still gooey and the crust is crisp. But honestly, I've seen people enjoy them at room temperature too - they're that good.
-
Let the browned beef cool before mixing with cheese to prevent melting
-
Stretch the biscuit dough gently to avoid tearing
-
Use a light touch when sealing - don't squeeze too hard
-
Brush butter evenly for consistent browning
Pro Tips
You know, I've made these so many times over the years, and the thing I've learned is that a little patience goes a long way. Letting the beef mixture cool properly means you get those perfect pockets of melted cheese instead of it all blending together. And when you're stretching the biscuit dough, just be gentle with it. It's forgiving, but you want to keep it even so it bakes uniformly. The first time I made these, I was in such a hurry to get them in the oven that I didn't let the beef cool enough. The cheese just kind of vanished into the meat. Live and learn, right? Now I take my time, and the results are so much better. The biscuits puff up around the filling like little clouds, and every bite has that perfect cheese pull.
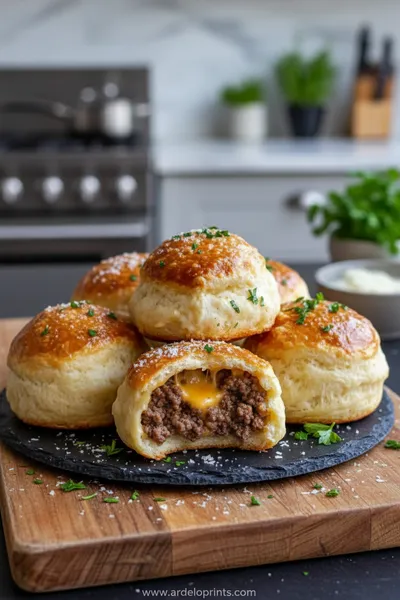
The essence of the dish:
It's really about that moment when you break one open and the steam escapes, carrying the scent of garlic and beef. The cheese stretches, the crust is golden, and you get all the classic burger flavors in one perfect bite-sized package. It feels like comfort food, but fancy enough for company.
A fun fact or historical angle:
The idea of enclosing meat in dough dates back centuries, but the cheeseburger bomb is a truly American invention, taking our love for burgers and making it party-friendly.
Flavor or sensory focus:
Your first impression will be the aroma - that warm, garlicky, cheesy scent. Then the texture: the slight resistance of the crust giving way to the soft, savory interior. It's a full sensory experience.
You Must Know
-
Don't skip cooling the beef mixture - hot filling will make the biscuits soggy
-
Seal the edges firmly but gently to prevent leaks during baking
-
The garlic butter topping is non-negotiable for that signature flavor
-
These reheat beautifully for next-day snacks
Frequently Asked Questions
→ Can I make these ahead of time?
You can assemble them up to a day ahead and keep them covered in the refrigerator. Just add a few minutes to the baking time since they'll be going in cold. The baked bombs also freeze beautifully for quick snacks later.
→ What's the best cheese to use?
Mozzarella gives that classic stretch, but you can mix in some cheddar for extra flavor. I've even used provolone when that's what I had on hand. The key is a good melting cheese that complements the beef.
→ Can I use a different meat?
Absolutely. Ground turkey works well, or even a plant-based ground meat substitute. I've made them with seasoned lamb too, and they were delicious. Just adjust the seasoning to match your protein.
→ How do I prevent the bottoms from getting soggy?
Make sure your beef isn't too greasy - drain it well after browning. And don't overfill the bombs. A little space between them on the baking sheet helps air circulate and keeps everything crisp.
→ What dipping sauces go well with these?
Marinara sauce is classic, but ranch dressing, barbecue sauce, or even a spicy mayo all work wonderfully. Sometimes we just eat them plain - they're flavorful enough on their own.
→ Can I bake these from frozen?
Yes, but you'll need to increase the baking time by about 5-7 minutes. Keep an eye on them and bake until golden brown and heated through. The cheese should be melted when you break one open to check.
Nutrition Facts
per serving
285
Calories
14g
Protein
18g
Carbs
18g
Fat
Taste Profile
Savory and rich with strong garlic and cheese notes balanced by the mild biscuit dough
Ingredient Substitutions
Don't have an ingredient? Try these alternatives
Adjust seasonings to complement the different protein
Choose a good melting cheese for best results
Adjust baking time if using a different dough type
Recipe Variations
Try these delicious twists on the original
Italian Style
Add some chopped pepperoni and italian seasoning to the beef mixture, and use provolone cheese instead of mozzarella.
BBQ Version
Mix barbecue sauce into the beef instead of Worcestershire, and use cheddar cheese. Brush with more BBQ sauce instead of garlic butter.
Common Mistakes to Avoid
Learn from others' mistakes for perfect results
- Adding hot filling to dough causes sogginess
- Overfilling makes sealing difficult and can cause leaks
- Not sealing edges properly allows cheese to escape during baking
- Overbaking results in dry filling and tough crust
Meal Prep & Storage
Make Ahead Tips
You can prepare the beef mixture up to 2 days in advance and store it covered in the refrigerator. The assembled bombs can be refrigerated for up to 24 hours before baking. Add a few extra minutes to the baking time if starting from cold.
Leftover Ideas
Reheat leftovers in a 350°F oven for about 10 minutes, or in an air fryer for 5-6 minutes until warm and crisp. They won't be quite as perfect as fresh, but still very tasty.
Perfect Pairings
Serve this with...
Cooking Timeline
Brown the beef and prepare the filling mixture, allowing it to cool
Assemble the bombs by filling and sealing the biscuit dough
Prepare garlic butter coating and brush onto bombs
Bake until golden brown and cooked through
Final butter brush and brief cooling before serving
 Dinner
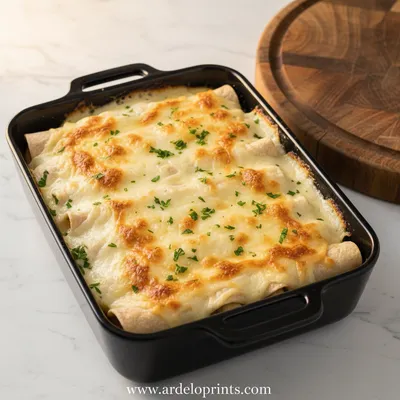
Easy White Chicken Enchiladas with Creamy Sauce
Quick white chicken enchiladas ready in 30 minutes with a luscious creamy sauce.

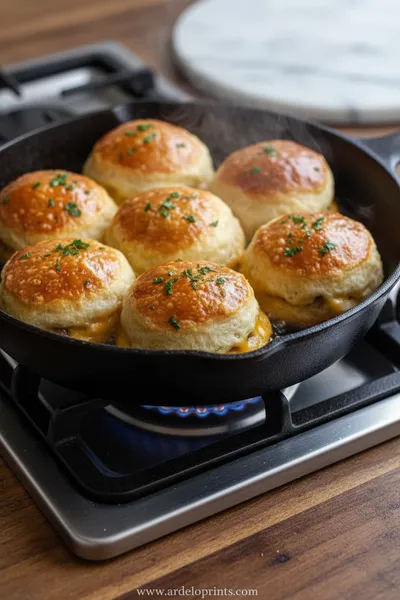
Garlic Parmesan Cheeseburger Bombs
These warm, savory garlic parmesan cheeseburger bombs are the ultimate comfort snack, with juicy beef, melted cheese, and a golden-brown biscuit crust that's impossible to resist.
Timing
Prep Time
20 Minutes
Cook Time
15 Minutes
Total Time
35 Minutes
Recipe Details
Ingredients
For the Filling
-
01
1 lb ground beef
-
02
1 teaspoon garlic powder
-
03
1 teaspoon onion powder
-
04
1/2 teaspoon salt
-
05
1/4 teaspoon black pepper
-
06
1 tablespoon Worcestershire sauce
-
07
4 oz mozzarella cheese, cut into small cubes
-
08
2 tablespoons grated parmesan cheese
For the Dough and Coating
-
01
1 can (16.3 oz) refrigerated biscuit dough (8 biscuits)
-
02
3 tablespoons butter, melted
-
03
2 cloves garlic, minced
-
04
2 tablespoons grated parmesan cheese
-
05
1 tablespoon fresh parsley, chopped
-
06
1/4 teaspoon salt
Instructions
Preheat your oven to 375°F (190°C) and line a baking sheet with parchment paper. In a skillet over medium heat, brown the ground beef, breaking it up as it cooks. Drain any excess grease, then stir in the garlic powder, onion powder, salt, pepper, and Worcestershire sauce. Remove from heat and let it cool for about 10 minutes. Then, stir in the mozzarella and parmesan cubes.
Separate the biscuit dough into 8 pieces. Gently stretch each biscuit into a 5-inch circle. Place about 1/4 cup of the beef mixture in the center of each circle. Bring the edges up and over the filling, pinching them together to seal. Place seam-side down on the prepared baking sheet, spacing them about 2 inches apart.
In a small bowl, mix the melted butter, minced garlic, 2 tablespoons parmesan, parsley, and salt. Brush this mixture generously over the tops of the bombs. You want that flavor to soak in as they bake.
Bake for 13-15 minutes, until the bombs are golden brown and cooked through. The smell will tell you when they're getting close. Remove from oven and brush with any remaining butter mixture. Let them cool for just a minute before serving - that cheese is hot!
Serve warm. They're perfect as is, but if you want to get fancy, you could offer some dipping sauces on the side. Honestly, they rarely last long enough for that.
Notes & Tips
-
1
Drain the beef well to prevent greasy bombs
-
2
Don't overwork the biscuit dough when stretching
-
3
Let cool slightly before serving - the filling stays very hot
-
4
These reheat well in the oven or air fryer
 International_Cuisine
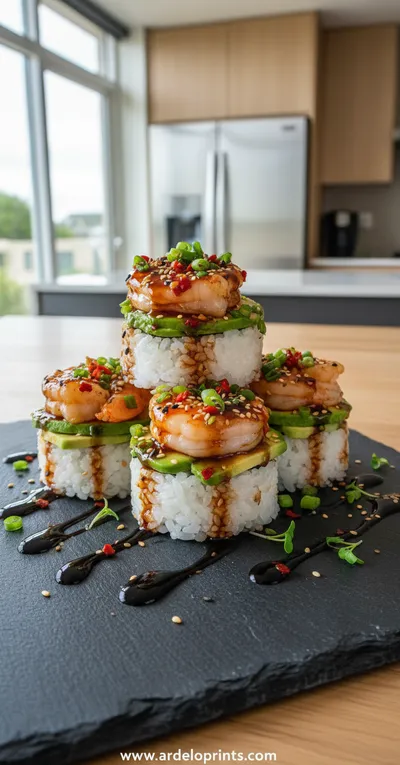
Spicy Shrimp Sushi Stacks
A fresh, vibrant bite combining seasoned shrimp, rice, and crisp toppings.
Tools You'll Need
-
Large skillet
-
Baking sheet
-
Parchment paper
-
Mixing bowls
-
Pastry brush
-
Measuring spoons
Must-Know Tips
-
Cool the beef mixture properly before adding cheese
-
Seal edges firmly but gently to prevent leaks
-
Space bombs evenly on baking sheet for even cooking
-
Brush with butter mixture for maximum flavor
Professional Secrets
-
Cool filling prevents soggy dough
-
Even sealing ensures perfect shape
-
Butter coating creates golden crust
-
Proper spacing allows for even baking

Recipe by
Oliver Brooks“Every great meal begins with the perfect bite. My passion is crafting irresistible starters that wow.” 🧀🍢
Get Delicious Recipes Weekly
Join 25,000+ home cooks getting our best recipes straight to their inbox.
Free forever • No spam • Unsubscribe anytime