Hot chocolate has warmed hands and hearts since the ancient Mayans first combined cocoa with water and spices. European explorers later brought chocolate to the continent, where it became a luxurious drink for aristocracy before evolving into the comforting staple we know today. The tradition of creating signature hot chocolate mixes at home spans generations, with each family adding their special touch to this timeless winter warmer.
Why You'll Love It
-
Ready in just minutes with pantry staples
-
Customizable sweetness and chocolate intensity
-
Perfect for gifting in beautiful jars
-
No artificial flavors or preservatives
"This is the best hot chocolate I've ever had - so rich and chocolatey without being too sweet!"
Essential Ingredient Guide
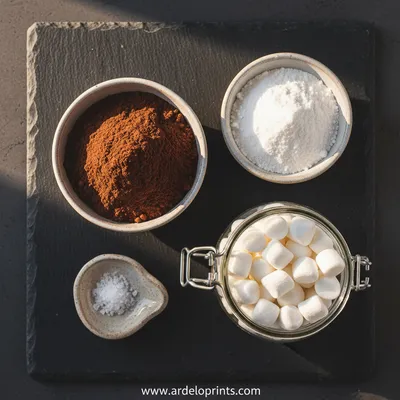
- Cocoa powder: Use natural cocoa powder for that classic hot chocolate flavor. The darker the cocoa, the richer your drink will be.
- Powdered sugar: This dissolves instantly and creates the perfect smooth texture. You can adjust the amount to your sweetness preference.
- Salt: Just a pinch enhances the chocolate flavor and cuts through the sweetness beautifully.
 Dinner
Creamy Low Carb Chicken Casserole
Low‑carb, creamy chicken casserole that feels indulgent without the noodles.
Complete Cooking Process
-
Ingredient Readiness:
Before you begin, measure all ingredients precisely. Sifting the cocoa powder and powdered sugar ensures no lumps in your final mix.
-
Flavor Development:
When you combine the cocoa with sugar and salt, the flavors begin to meld. The salt brightens the chocolate notes, making them more pronounced.
-
Texture Control:
Thorough mixing creates an even distribution of ingredients so every scoop makes perfect hot chocolate.
-
Finishing Touches:
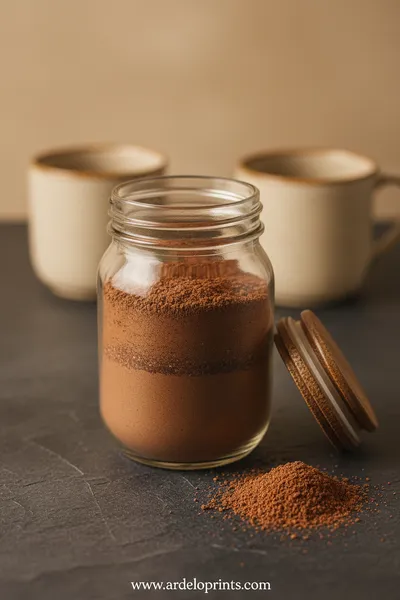
Store the mix in an airtight container to preserve freshness. A beautiful jar makes this perfect for holiday gifting.
-
Serving Timing:
The mix keeps for months, ready whenever a cozy moment calls. After a crisp autumn walk or during Halloween festivities, it's the perfect warm-up.
-
Sift ingredients twice for ultra-smooth texture
-
Add a pinch of cinnamon for warm spice notes
-
Use high-quality cocoa for the best flavor
-
Label jars with instructions for perfect results every time
Pro Tips
Making this mix always takes me back to crisp fall evenings when the kids would come in from playing outside, their cheeks flushed with cold. I'd have the mix ready, and we'd stir up mugs while they told me about their adventures. The kitchen would fill with that warm chocolate scent, and for a little while, everything felt just right. These days, I keep a jar on hand for unexpected visitors or when I need a moment of quiet comfort. It's amazing how something so simple can hold so many memories. I sometimes add this mix to my Halloween baking routine - it pairs wonderfully with spooky treats.
 Snacks
Easy Fruit Dip Recipe
Creamy, easy fruit dip for fresh fruit, perfect for any snack or dessert.
The essence of the dish:
This hot chocolate mix captures the pure comfort of chocolate in its simplest form. Unlike complicated recipes, it celebrates the basic pleasure of warm cocoa melting on your tongue.
A fun fact or historical angle:
The first chocolate drinks were actually bitter and spicy - the Mayans added chili peppers! Our sweet version evolved much later in Europe.
Flavor or sensory focus:
You'll notice the deep chocolate richness first, followed by the perfect balance of sweetness that doesn't overwhelm. The warmth spreads through your hands as you hold the mug.
You Must Know
-
Always use boiling liquid for proper dissolving
-
Stir continuously until fully incorporated
-
Adjust milk-to-mix ratio to taste preference
-
Store in a cool, dry place to prevent clumping
Frequently Asked Questions
→ Can I use this mix with water instead of milk?
Absolutely! While milk creates a creamier result, water works perfectly fine and lets the pure chocolate flavor shine through.
→ How long does the mix keep?
Stored in an airtight container, it will stay fresh for about 6 months. Make sure to keep it in a cool, dry place.
→ Can I add marshmallows or whipped cream?
Of course! Top with mini marshmallows, whipped cream, or even a sprinkle of cinnamon for extra coziness.
→ Is this mix gluten-free?
Yes, as long as your ingredients are certified gluten-free, this recipe is naturally gluten-free.
→ Can I make a larger batch for gifting?
Definitely! Just multiply the ingredients proportionally. This mix makes wonderful holiday gifts paired with a cute mug.
→ What's the difference between this and store-bought mixes?
No artificial ingredients, customizable sweetness, and that homemade taste you just can't get from a packet.

Nutrition Facts
per serving
120
Calories
2g
Protein
28g
Carbs
1g
Fat
Taste Profile
Rich chocolate sweetness with balanced warmth
Ingredient Substitutions
Don't have an ingredient? Try these alternatives
May result in slightly grainier texture but works in a pinch
Powdered milk adds creaminess, omitting creates simpler mix
Recipe Variations
Try these delicious twists on the original
Mint Chocolate Version
Add 1/4 cup crushed peppermint candies or 1 tablespoon peppermint extract
Spiced Mexican Style
Add 1 tablespoon cinnamon and 1/2 teaspoon chili powder for warm spice
Common Mistakes to Avoid
Learn from others' mistakes for perfect results
- Not sifting ingredients resulting in lumps
- Using expired cocoa powder affecting flavor
- Storing in humid environments causing clumping
- Measuring inaccurately leading to inconsistent results
Meal Prep & Storage
Make Ahead Tips
This mix can be made weeks in advance and stored properly. It actually improves as the flavors meld together over time.
Leftover Ideas
Store any prepared hot chocolate in the refrigerator for up to 3 days. Reheat gently on the stove or microwave.
Perfect Pairings
Serve this with...
Cooking Timeline
Gather and measure all ingredients
Sift and mix dry ingredients together
Transfer to storage container and label
 Desserts
Inside Out Chocolate Chip Cookies
Chewy cookies with crisp edges and a melt‑in‑your‑mouth center.
Homemade Hot Chocolate Mix: Just Add Water or Milk
This homemade hot chocolate mix creates the coziest drink in minutes. Just add water or milk for a warm, comforting treat that feels like a hug in a mug. Honestly, it's so much better than store-bought.
Timing
Prep Time
5 Minutes
Cook Time
0 Minutes
Total Time
5 Minutes
Recipe Details
Ingredients
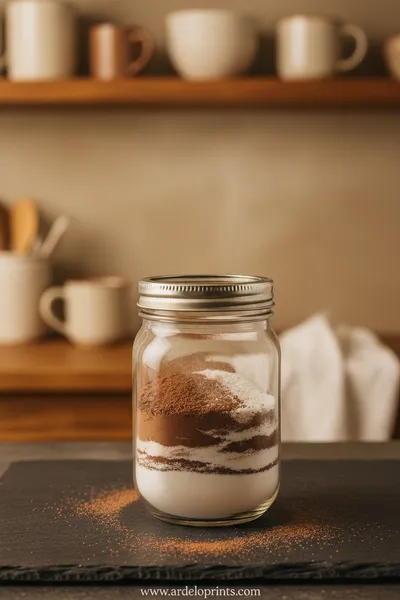
Hot Chocolate Mix
-
01
2 cups powdered sugar
-
02
1 cup unsweetened cocoa powder
-
03
1 teaspoon salt
-
04
1/2 cup non-dairy creamer powder (optional)
Instructions
Sift the powdered sugar and cocoa powder together into a large bowl. This prevents lumps and ensures smooth mixing.
Add the salt and optional creamer powder if using. Whisk everything together until completely combined and uniform in color.
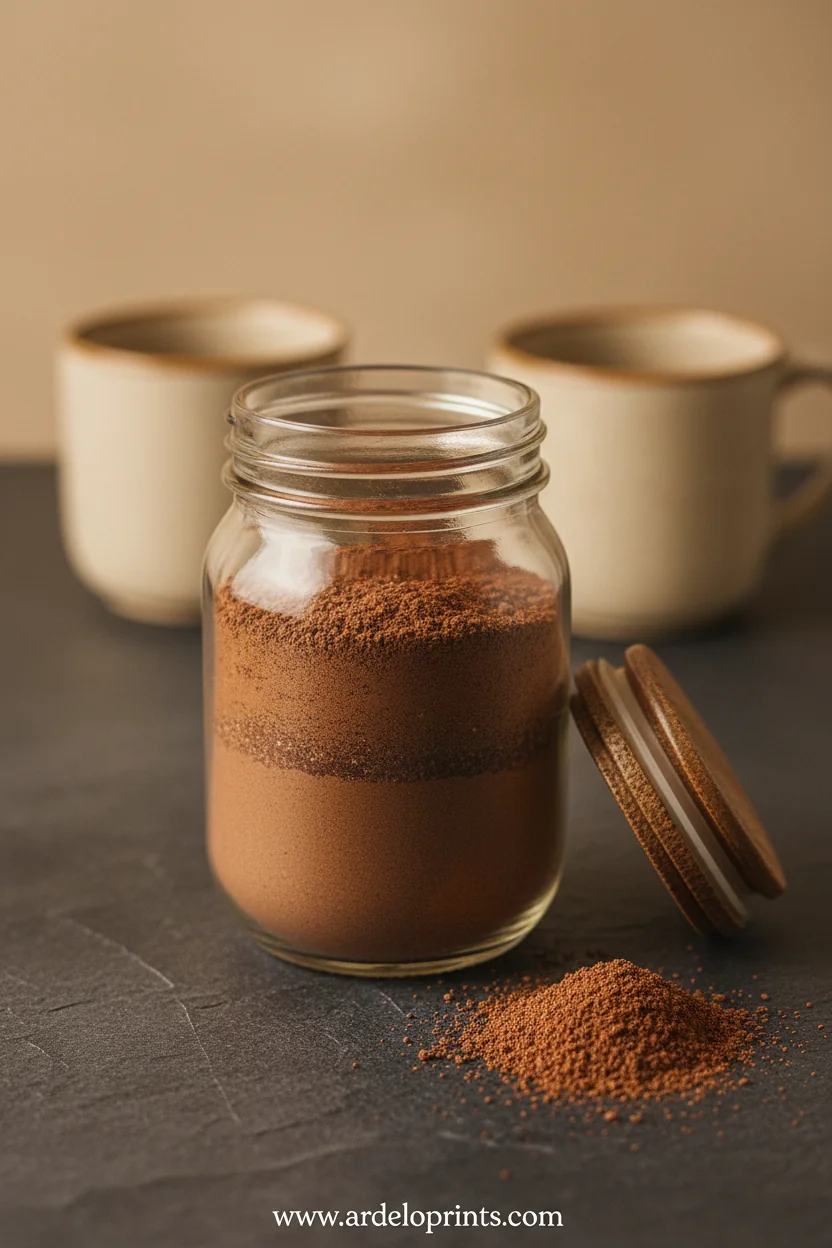
Transfer the mix to an airtight container. A mason jar works perfectly for storage and gifting.
To serve: Add 2-3 tablespoons of mix to a mug. Pour in 8 ounces of hot milk or water and stir until dissolved.
Notes & Tips
-
1
For extra richness, use whole milk instead of water
-
2
Add a drop of vanilla extract to your mug for enhanced flavor
-
3
Perfect for making spooky treats during Halloween season
-
4
Store away from moisture to prevent clumping
 Desserts
Cinnamon Roll Cake Recipe
Fluffy cinnamon roll cake with caramelized swirl, ideal for breakfast or snack.
Tools You'll Need
-
Large mixing bowl
-
Whisk
-
Sifter or fine mesh strainer
-
Airtight storage container
-
Measuring cups
Must-Know Tips
-
Sift ingredients twice for smoothest texture
-
Taste test and adjust sweetness to preference
-
Label your container with mixing instructions
-
Use within 6 months for best flavor
Professional Secrets
-
High-quality cocoa makes all the difference
-
A pinch of salt enhances chocolate flavor
-
Non-dairy creamer adds creaminess without dairy
-
Store in glass jars to preserve freshness

Recipe by
Mason Cole“Sweet cravings are my specialty! I turn sugar, chocolate, and imagination into pure dessert magic.” 🍰✨
Get Delicious Recipes Weekly
Join 25,000+ home cooks getting our best recipes straight to their inbox.
Free forever • No spam • Unsubscribe anytime