The concept of a no‑bake protein bar traces back to the early 2000s when fitness enthusiasts needed portable nutrition without heating a kitchen. Over time, vegans adopted the idea, swapping whey for plant proteins and introducing gluten‑free grains. This evolution reflects a broader shift toward cleaner, simpler snacks that fit busy lives.
Why You'll Love It
-
- No oven needed, perfect for summer kitchens
-
- Vegan and gluten‑free, fits many dietary needs
-
- Quick to assemble, under 15 minutes total time
-
- Stores well, great for grab‑and‑go
"These bars are my go‑to post‑run snack—soft, sweet, and surprisingly filling!"
Essential Ingredient Guide
- Rolled oats: Choose gluten‑free certified oats; they give body and a gentle chew.
- Plant‑based protein powder: A neutral‑flavored pea protein works best; it blends without clumping.
- Nut butter: Almond or cashew butter adds richness and helps bind the bars.
- Maple syrup: A natural sweetener that also aids in binding; use pure maple for depth.
- Lemon zest: A tiny bit brightens the flavor and balances the sweetness.
- Vanilla extract: Just a splash for warmth; it rounds the whole profile.
Complete Cooking Process
-
Ingredient Readiness:
Measure everything, line a pan with parchment, and have your food processor ready.
-
Flavor Development:
Toast the oats lightly, then blend with nut butter and maple syrup to release caramel notes.
-
Texture Control:
Pulse the mixture until coarse; you want little oat fragments for bite.
-
Finishing Touches:
Add lemon zest and vanilla, press firmly into the pan, then chill.
-
Serving Timing:
Let the bars set in the fridge for at least 30 minutes before slicing.
-
Press the mixture firmly – a gentle press leads to crumbling.
-
If the mix feels dry, add a teaspoon of water or extra maple syrup.
-
Chill on a sturdy tray to keep the bars even.
-
Store in an airtight container for up to a week.
Pro Tips
When you pull a bar from the fridge, notice how the coolness makes the texture a little firmer, then it softens as it warms in your hand. It’s a small pleasure, like the calm after a rainstorm, and it reminds me to slow down and savor each bite.
 Snacks
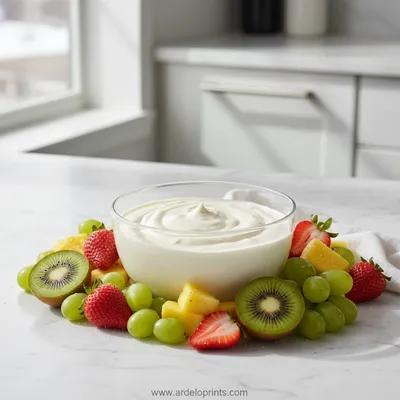
Easy Fruit Dip Recipe
Creamy, easy fruit dip for fresh fruit, perfect for any snack or dessert.
The essence of the dish:
What makes these bars special is the marriage of wholesome oats, creamy nut butter, and a plant‑based protein boost that creates a chew that’s satisfying without being dense.
A fun fact or historical angle:
During the early days of fitness bars, many recipes called for whey and honey; this vegan version honors that tradition while staying inclusive.
Flavor or sensory focus:
You’ll first notice a gentle sweetness, then the nutty undertone, and finally the bright zing of lemon that lingers on the palate.
You Must Know
-
Use gluten‑free oats to avoid hidden wheat.
-
Mix until just combined – over‑mixing can make the bars too dense.
-
Chill before cutting to keep shapes tidy.
Frequently Asked Questions
→ Can I use other sweeteners?
Yes, maple syrup can be swapped for agave nectar or brown rice syrup; just keep the same volume.
→ How long do they stay fresh?
Stored in an airtight container in the fridge, they’re best within 5‑7 days.
→ Can I make them nut‑free?
Replace the nut butter with sunflower seed butter or soy butter and keep other ingredients the same.
→ Do I need a food processor?
A sturdy mixing bowl and a fork work, but a processor makes the texture smoother.
→ What protein powder works best?
Unflavored or vanilla pea protein blends well; avoid soy powders if you have sensitivities.
→ Can I add chocolate chips?
Absolutely – fold in a handful after mixing, or sprinkle on top before chilling.
Nutrition Facts
per serving
210
Calories
8g
Protein
22g
Carbs
12g
Fat
Taste Profile
A balanced sweet‑nutty flavor with a gentle lemon brightness
Ingredient Substitutions
Don't have an ingredient? Try these alternatives
Keeps the bar nut‑free while maintaining creaminess.
Provides similar sweetness; you may need slightly less.
Recipe Variations
Try these delicious twists on the original
Spicy Version
Add 1/2 tsp cayenne and a pinch of smoked paprika for a warm kick.
Mediterranean Style
Mix in chopped pistachios, dried apricots, and a drizzle of tahini.
Common Mistakes to Avoid
Learn from others' mistakes for perfect results
- Over‑mixing the batter, which makes bars too dense.
- Skipping the chilling step; bars become crumbly.
- Using non‑gluten‑free oats, introducing hidden wheat.
Meal Prep & Storage
Make Ahead Tips
You can blend the base mixture up to 24 hours ahead; keep it refrigerated and press into a pan when ready to chill.
Leftover Ideas
Reheat gently in a skillet with a splash of water to restore softness, or enjoy cold.
Perfect Pairings
Serve this with...
Cooking Timeline
Gather and measure all ingredients; line pan with parchment.
Warm nut butter and syrup, then combine with dry ingredients.
Add zest, vanilla, optional add‑ins; press mixture into pan.
Chill in the refrigerator until firm, then cut into bars.
 Desserts
Inside Out Chocolate Chip Cookies
Chewy cookies with crisp edges and a melt‑in‑your‑mouth center.

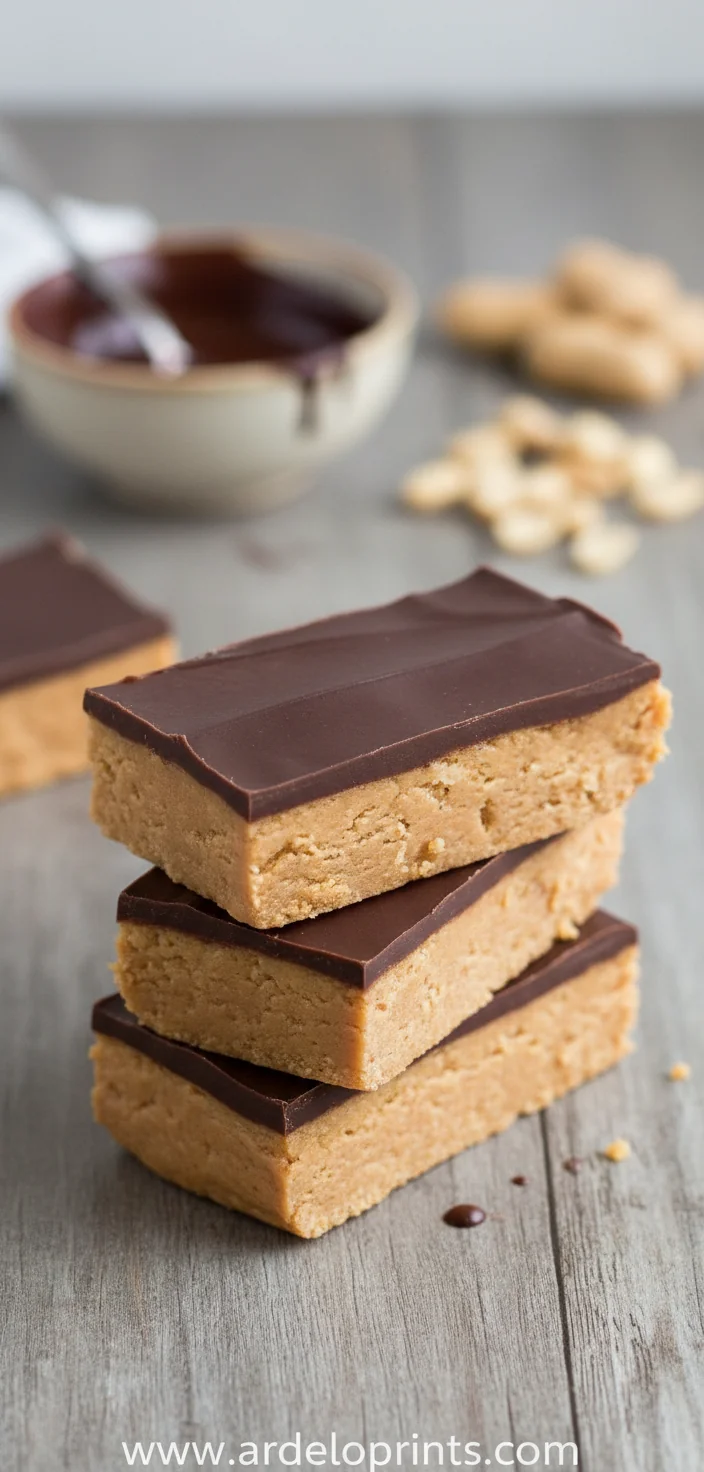
No Bake Protein Bar – Easy Vegan & Gluten-Free
Whip up these no bake protein bars in minutes—vegan, gluten‑free, and perfect for a healthy snack any time. The bars are soft, chewy, and packed with plant‑based protein, making them a comforting treat you can feel good about. Honestly, they come together with just a few pantry staples, and the aroma of toasted oats and nut butter fills the kitchen, reminding me of quiet afternoons spent mixing and waiting patiently.
Timing
Prep Time
10 Minutes
Cook Time
0 Minutes
Total Time
30 Minutes
Recipe Details
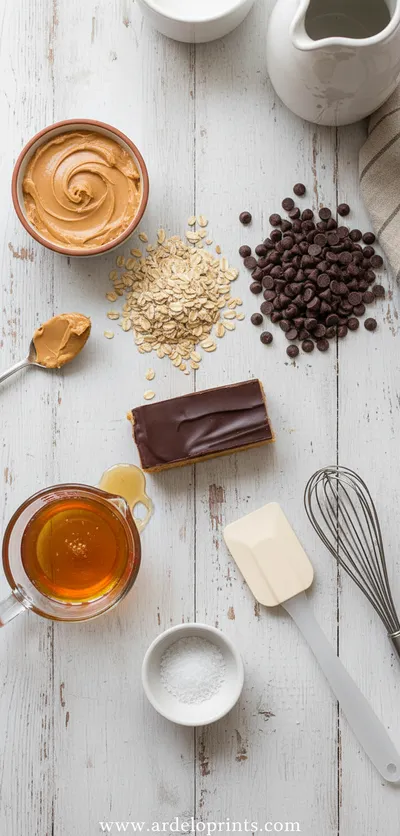
Ingredients
Base
-
01
2 cups gluten‑free rolled oats
-
02
1 cup almond butter (or any nut butter)
-
03
1/3 cup pure maple syrup
-
04
1/4 cup plant‑based protein powder
-
05
Zest of 1 lemon
-
06
1 tsp vanilla extract
Optional Add‑Ins
-
01
2 tbsp dried cranberries, chopped
-
02
2 tbsp dark chocolate chips
-
03
1 tbsp chia seeds
Instructions
In a large bowl, combine the rolled oats and protein powder; stir until evenly distributed.
Warm the almond butter and maple syrup together in a microwave for 20‑30 seconds, just until runny, then pour over the dry ingredients.
Add lemon zest and vanilla, then mix with a wooden spoon until the mixture holds together when pressed.
If using optional add‑ins, fold them in now; press the entire mixture firmly into a parchment‑lined 8×8‑inch pan.
Refrigerate for at least 30 minutes, then cut into 12 bars. No bake cookie dough fans will love the texture.
Notes & Tips
-
1
If the mixture feels too crumbly, add a teaspoon of water or more maple syrup.
-
2
Press firmly; a flat bottom of a glass works well for even pressure.
-
3
For a tropical twist, swap almond butter for sunflower seed butter and add shredded coconut.
Tools You'll Need
-
Large mixing bowl
-
Wooden spoon
-
Microwave‑safe measuring cup
-
8×8‑inch baking pan
-
Parchment paper
-
Sharp knife
Must-Know Tips
-
Don’t over‑mix; keep a few oat pieces for texture.
-
Let the bars chill completely before slicing to avoid crumbling.
-
Store in the fridge; they can become too soft at room temperature.
Professional Secrets
-
Toast the oats lightly for added nuttiness.
-
Use room‑temperature nut butter for smoother blending.
-
Press the mixture with a damp hand to prevent sticking.

Recipe by
Lily_HarperFrom crispy bites to soft nibbles, I’m all about snack-time happiness made simple and delicious.
Get Delicious Recipes Weekly
Join 25,000+ home cooks getting our best recipes straight to their inbox.
Free forever • No spam • Unsubscribe anytime