
The origins of chocolate‑peanut butter ice cream trace back to mid‑20th‑century American diners, where creative cooks blended classic flavors to please the growing love for sweet, nutty treats. Over time the combination has become a beloved staple in dessert menus across the country. This recipe honors that history while adding a home‑made touch that feels both nostalgic and fresh.
Why You'll Love It
-
- Silky chocolate base that melts slowly
-
- Creamy peanut butter ribbons for depth
-
- No churn needed if you have a Ninja Creami
-
- Simple pantry ingredients, no fancy equipment
-
- Makes a perfect finish to any dinner
"The richest ice cream I’ve ever tasted—like an instant smile!"
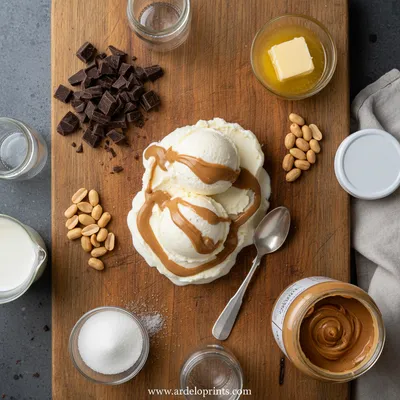
Essential Ingredient Guide
- Heavy cream: Choose a high‑fat cream for a buttery mouthfeel; you’ll notice the smoothness as it freezes.
- Dark chocolate: Use 70% cocoa for a balanced bitter‑sweet profile; melt gently to preserve gloss.
- Natural peanut butter: Stir in small dollops to create ribbons; it adds a salty‑sweet contrast.
- Vanilla extract: A splash brightens the chocolate without overpowering it.
- Brown sugar: Dissolves easily, lending caramel notes that echo the roasted peanuts.
- Sea salt: A pinch at the end heightens both chocolate and peanut flavors.
Complete Cooking Process
-
Ingredient Readiness:
Measure and warm the cream, sugar, and chocolate together until smooth; let the mixture cool to room temperature before adding peanut butter.
-
Flavor Development:
As the base cools, the chocolate deepens and the vanilla weaves through, creating a fragrant backdrop.
-
Texture Control:
When churning, add peanut butter in slow streams so it forms beautiful ribbons rather than a uniform swirl.
-
Finishing Touches:
Fold in a pinch of sea salt and a drizzle of melted chocolate just before freezing to amplify the flavor.
-
Serving Timing:
Let the ice cream sit at room temperature for five minutes before scooping; it softens just enough for elegant swirls.
-
Use chilled bowls for quicker setting
-
Add a splash of coffee for an unexpected depth
-
Freeze your mixing bowl beforehand if you’re using an ice‑cream maker
-
Store leftovers in an airtight container to avoid ice crystals
Pro Tips
Well, these little adjustments can make a big difference. I’ve found that a cold bowl helps the ice cream hold its shape, and a coffee note adds a subtle aroma that pairs nicely with the chocolate. Also, when you store it right, the texture stays luxuriously smooth for days. So, take your time, enjoy the process, and remember that a gentle hand yields the most comforting treat.
The essence of the dish:
It’s the marriage of rich, glossy chocolate with the earthy, nutty warmth of peanut butter, creating a balance that feels both indulgent and familiar.
A fun fact or historical angle:
During the 1960s, chocolate and peanut butter were often paired in classic sandwich cookies, a precursor to today’s frozen desserts.
Flavor or sensory focus:
You’ll first notice the dark chocolate’s gentle bitterness, then the creamy sweetness of the peanut butter ribbons, all wrapped in a velvety, cold embrace.
You Must Know
-
Use whole‑milk dairy for best texture
-
Don’t over‑mix after adding peanut butter
-
Freeze quickly to avoid graininess
Frequently Asked Questions
→ Can I make this without an ice cream maker?
Yes, simply stir the mixture every 30 minutes as it freezes to break up ice crystals; this mimics churned texture.
→ How do I keep the peanut butter from melting completely?
Add it in thin streams while the ice cream is still soft; it will form ribbons that stay within the frozen base.
→ Can I substitute almond butter?
Absolutely; almond butter will bring a slightly different nutty note and works the same in ribbons.
→ Is this recipe gluten‑free?
Yes, all ingredients listed are naturally gluten‑free.
→ How long can I store it?
Keep it in an airtight container in the freezer for up to two weeks; for best texture, consume within a week.
→ Can I add toppings like chocolate chips?
Feel free to fold in a handful of dark chocolate chips after the final freeze for an extra crunch.
Nutrition Facts
per serving
310
Calories
5g
Protein
28g
Carbs
22g
Fat
Taste Profile
Rich chocolate with a comforting peanut butter swirl
Ingredient Substitutions
Don't have an ingredient? Try these alternatives
Will give a slight coconut aroma; keep the mixture chilled.
Provides a milder flavor and works the same for ribbons.
Recipe Variations
Try these delicious twists on the original
Spicy Version
Add a pinch of cayenne pepper and a dash of sriracha to the chocolate base for a subtle heat.
Mediterranean Style
Swap peanut butter for almond butter and finish with a sprinkle of toasted pistachios.
Common Mistakes to Avoid
Learn from others' mistakes for perfect results
- Over‑heating the chocolate, which can cause a grainy texture.
- Adding peanut butter too early, resulting in a uniform mix instead of ribbons.
- Freezing the base without stirring, leading to ice crystals.
Meal Prep & Storage
Make Ahead Tips
You can prepare the ice cream base the night before and keep it chilled; swirl in the chocolate and peanut butter fresh before the final freeze.
Leftover Ideas
Re‑scoop a portion and let it soften at room temperature for a few minutes before enjoying again.
Perfect Pairings
Serve this with...
Cooking Timeline
Combine cream, milk, and brown sugar; heat until sugar dissolves.
Whisk in cocoa, vanilla, and salt; bring to a smooth consistency.
Cool the base, then refrigerate for at least 2 hours.
Churn in ice‑cream maker or stir manually while freezing.
Swirl melted chocolate and peanut butter ribbons; freeze to set.
 Dinner
Creamy Low Carb Chicken Casserole
Low‑carb, creamy chicken casserole that feels indulgent without the noodles.
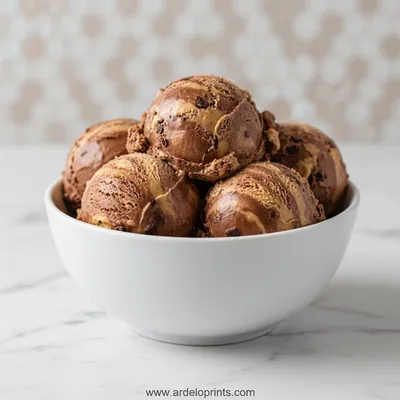
Chocolate Peanut Butter Ice Cream
Indulge in a velvety swirl of chocolate and peanut butter, a frozen delight that feels like a quiet hug on a warm kitchen night. The creamy texture is punctuated by a gentle crunch, and the aroma whispers of cocoa and roasted peanuts. This dessert is perfect for an after‑dinner treat or a comforting snack on a lazy afternoon.
Timing
Prep Time
20 Minutes
Cook Time
15 Minutes
Total Time
35 Minutes
Recipe Details
Ingredients
Ice Cream Base
-
01
2 cups heavy cream
-
02
1 cup whole milk
-
03
3/4 cup brown sugar
-
04
1/2 cup unsweetened cocoa powder
-
05
1 tsp vanilla extract
-
06
1/4 tsp sea salt
Chocolate & Peanut Butter Swirl
-
01
1/2 cup dark chocolate chips
-
02
1/3 cup natural peanut butter
Instructions
In a saucepan, combine heavy cream, milk, and brown sugar; heat gently until sugar dissolves, stirring with a wooden spoon.
Whisk in cocoa powder, vanilla, and sea salt; continue stirring until the mixture is smooth and glossy.
Remove from heat and let cool to room temperature, then refrigerate for at least 2 hours or overnight for deeper flavor.
If using an ice‑cream maker, churn the chilled base according to manufacturer’s instructions, about 20‑25 minutes.
While the ice cream churns, melt dark chocolate chips in a microwave or double boiler, then drizzle gently into the churn, letting ribbons form.
Finally, swirl in spoonfuls of peanut butter, allowing it to create thick, creamy ribbons without fully mixing.
Transfer the ice cream to a freezer‑safe container, smooth the top, and freeze for at least 2 hours before serving.
Notes & Tips
-
1
For a smoother texture, strain the base through a fine‑mesh sieve before chilling.
-
2
If you prefer a less sweet dessert, reduce the brown sugar by 2 tbsp.
-
3
A pinch of espresso powder can heighten the chocolate flavor without adding bitterness.
 Desserts
Inside Out Chocolate Chip Cookies
Chewy cookies with crisp edges and a melt‑in‑your‑mouth center.
Tools You'll Need
-
Saucepan
-
Whisk
-
Wooden spoon
-
Ice cream maker (optional)
-
Freezer‑safe container
-
Microwave‑safe bowl
Must-Know Tips
-
Don’t over‑heat the chocolate, it can seize.
-
Keep the peanut butter cool before swirling to keep ribbons distinct.
-
Taste the base before freezing; adjust sweetness if needed.
Professional Secrets
-
Chill the mixing bowl for a faster set.
-
Add a splash of coffee for a hidden depth.
-
Use a metal spatula for gentle ribbon creation.

Recipe by
Mason Cole“Sweet cravings are my specialty! I turn sugar, chocolate, and imagination into pure dessert magic.” 🍰✨
Get Delicious Recipes Weekly
Join 25,000+ home cooks getting our best recipes straight to their inbox.
Free forever • No spam • Unsubscribe anytime