
The Oreo cookie itself has a rich history, dating back to 1912. These no-bake balls are a more modern invention, a testament to the cookie's enduring versatility. They capture the essence of the beloved sandwich cookie in a new, elegant form, perfect for potlucks and parties where a simple yet impressive dessert is required. The combination of crushed cookies and cream cheese is a classic that has stood the test of time.
Why You'll Love It
-
- Incredibly easy, no-bake recipe perfect for beginners.
-
- Uses just a few simple ingredients you might already have.
-
- The creamy, crunchy texture is absolutely irresistible.
-
- Perfect for making ahead for parties and potlucks.
"I’ve made these for every holiday gathering for the past five years, and they always disappear first! So easy and always a hit."
Essential Ingredient Guide
- Oreo Cookies: The star of the show. Use the regular kind for that classic flavor. You'll need the whole cookie, cream filling and all, for the right texture and sweetness.
- Cream Cheese: This binds everything together and adds a lovely tangy creaminess. Make sure it's softened to room temperature so it mixes in smoothly without lumps.
- Chocolate Chips: For coating. Semi-sweet is classic, but you can use milk or dark chocolate depending on your preference. Good quality chocolate melts smoothly for a perfect shell.
- Vegetable Shortening: Just a tiny bit added to the melting chocolate helps it thin out for a smooth, delicate coating that doesn't crack.
- Sprinkles: Optional, but they add a festive touch and a bit of colorful crunch. Add them right after dipping before the chocolate sets.
Complete Cooking Process
-
Ingredient Readiness:
Letting the cream cheese soften on the counter is key. Cold cream cheese will make lumpy, difficult-to-roll balls. The Oreos need to be finely crushed into a sand-like consistency.
-
Flavor Development:
The flavor really comes alive after the mixture chills. The cookie crumbs hydrate slightly from the cream cheese, and the flavors meld together into a rich, familiar Oreo taste, only creamier.
-
Texture Control:
Chilling the mixture thoroughly before rolling is the most critical step for texture. A firm, cold mixture rolls into neat balls that won't fall apart during dipping.
-
Finishing Touches:
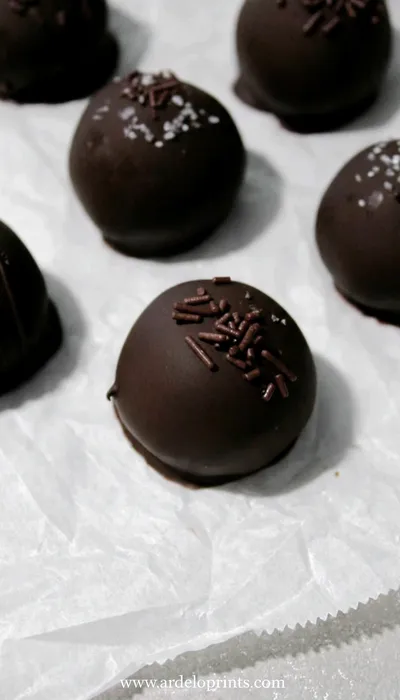
The tempered chocolate coating sets into a crisp shell that contrasts beautifully with the soft, cool center. Adding sprinkles immediately after dipping ensures they stick.
-
Serving Timing:
These are best served chilled. The cool, firm center is the ideal texture. They can sit out for a little while at a party, but I always keep them in the fridge until right before serving.
-
Use a food processor for the Oreos - it's faster and creates a finer, more even crumb.
-
Chill the rolled balls for at least an hour. Honestly, longer is better. This prevents them from falling apart in the warm chocolate.
-
Use a fork or a dipping tool to lower the balls into the chocolate, tapping off the excess for a thin, even coating.
-
If the chocolate starts to thicken, gently reheat it for a few seconds to keep it fluid.
Pro Tips
I remember one time I was in a rush and didn't chill the mixture long enough. Oh, what a mess, honestly. The balls were too soft and started melting into the chocolate. It was still tasty, but not nearly as pretty. So yeah, patience is your friend here.
These treats are so versatile. Sometimes I think about how a hearty, savory dish like a hearty crockpot beef stew needs a simple dessert like this to finish the meal. Something light and sweet after all that rich, comforting flavor. It’s the perfect balance.
 Desserts
Inside Out Chocolate Chip Cookies
Chewy cookies with crisp edges and a melt‑in‑your‑mouth center.
The essence of the dish:
What makes these special is their deceptive simplicity. They look and taste like a gourmet truffle, but they're made from humble ingredients everyone knows and loves. It’s that magic transformation, you know?
A fun fact or historical angle:
The Oreo cookie was famously launched the same year the Titanic sank, 1912. It’s outlasted countless other food trends, and this recipe is a modern celebration of its staying power.
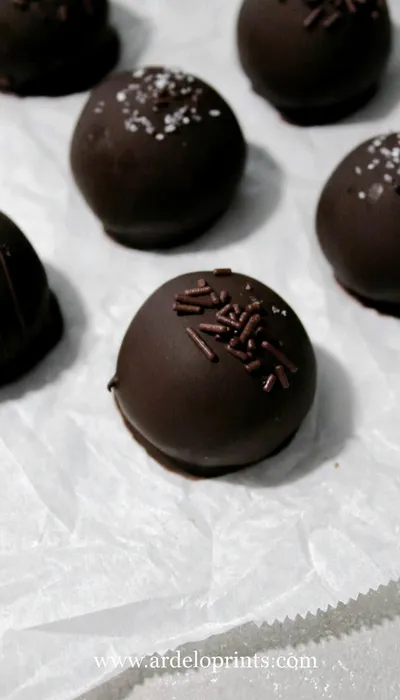
Flavor or sensory focus:
The first thing you'll notice is the snap of the chocolate shell. Then, your teeth sink into the cool, creamy, intensely chocolatey center with that signature Oreo crunch. It's a wonderful contrast of textures.
You Must Know
-
Do not skip the chilling step. It is non-negotiable for the right texture.
-
The cream cheese must be full-fat for the proper creamy consistency.
-
Melt your chocolate gently, using a double boiler or the microwave in short bursts, to avoid seizing.
Frequently Asked Questions
→ Can I use low-fat cream cheese?
I wouldn't recommend it, honestly. Full-fat cream cheese has the right texture and richness to bind the balls properly. Low-fat versions can make the mixture too wet and soft.
→ How far in advance can I make these?
You can make them up to 3 days ahead. Just store them in an airtight container in the refrigerator. They also freeze wonderfully for up to a month. Thaw in the fridge before serving.
→ My chocolate coating is too thick. What did I do wrong?
It probably got a bit too hot and the cocoa butter separated. Try adding a tiny bit of vegetable shortening to thin it out. And always melt gently!
→ Can I use a different type of cookie?
Absolutely! This method works with many sandwich cookies. Golden Oreos or mint Oreos are delicious variations. Just make sure it's a cookie with a cream filling.
→ Why did my balls fall apart when I tried to dip them?
This almost always means they weren't chilled long enough. The mixture needs to be very firm. Pop them back in the freezer for another 30 minutes and try again.
→ What's the best way to melt the chocolate?
A double boiler is best for control, but the microwave works too. Use 50% power in 30-second bursts, stirring well between each, until smooth.
Nutrition Facts
per serving
150
Calories
2g
Protein
17g
Carbs
9g
Fat
Taste Profile
Decadently sweet and chocolatey with a creamy, tangy undertone from the cream cheese.
Ingredient Substitutions
Don't have an ingredient? Try these alternatives
Mascarpone is richer and less tangy, creating an even more decadent truffle.
White chocolate is sweeter, dark chocolate is less sweet and more intense. Adjust to your taste.
Recipe Variations
Try these delicious twists on the original
Peanut Butter Oreo Balls
Use Peanut Butter Oreos for a nutty twist. You can even roll the balls in crushed peanuts after dipping.
Mint Chocolate
Use Mint Oreos and dip them in dark chocolate. A drop of peppermint extract in the coating adds extra freshness.
Cake Batter
Add a tablespoon of yellow cake mix to the crumb mixture and use rainbow sprinkles for a funfetti effect.
Common Mistakes to Avoid
Learn from others' mistakes for perfect results
- Not chilling the mixture long enough, resulting in sticky, hard-to-roll balls.
- Using cold cream cheese, which creates a lumpy, uneven mixture.
- Overheating the chocolate, causing it to seize and become grainy and thick.
Meal Prep & Storage
Make Ahead Tips
You can make these up to 3 days ahead. The rolled, un-dipped balls can be frozen for a month. Thaw in the fridge before dipping, or dip while frozen and then freeze the finished truffles.
Leftover Ideas
Leftovers should be stored in the refrigerator. They are best eaten within 5 days. The texture remains perfect.
Perfect Pairings
Serve this with...
Cooking Timeline
Crush Oreos and mix with softened cream cheese until a uniform dough forms.
Chill the mixture in the refrigerator to firm up.
Roll the chilled mixture into balls and place on a parchment-lined tray.
Freeze the rolled balls for 20 minutes to solidify.
Melt chocolate and dip each frozen ball, decorating with sprinkles. Let set.
 Desserts
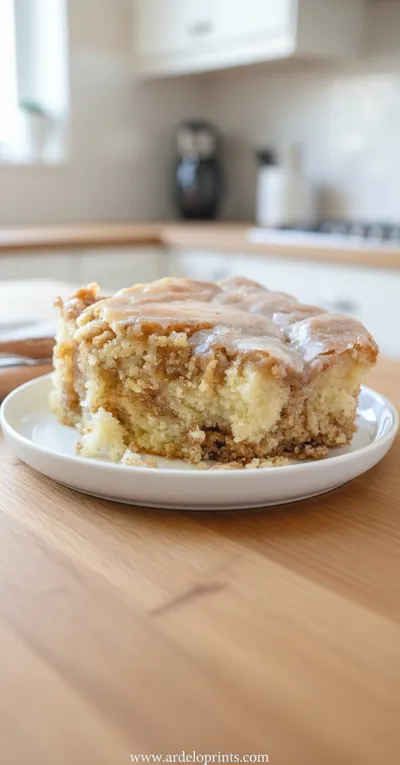
Cinnamon Roll Cake Recipe
Fluffy cinnamon roll cake with caramelized swirl, ideal for breakfast or snack.
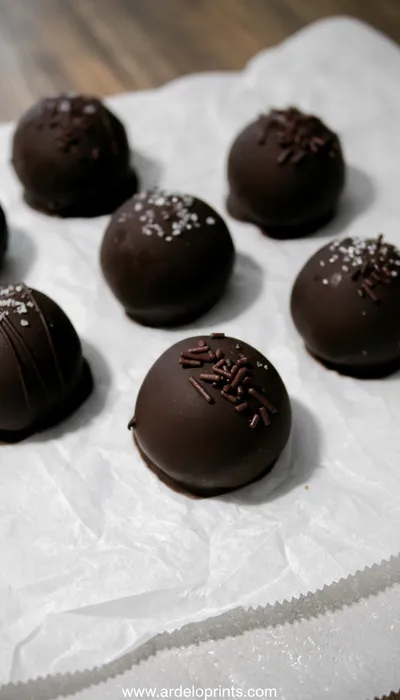
Easy Oreo Balls Recipe
These simple no-bake Oreo balls are a delicious dessert perfect for any occasion. Honestly, they come together with just a few ingredients and require no oven time, wow. The creamy, crumbly texture and sweet chocolate coating make them irresistible, yeah.
Timing
Prep Time
25 Minutes
Cook Time
0 Minutes
Total Time
1 Hour 25 Minutes
Recipe Details
Ingredients
For the Oreo Balls
-
01
1 package (14.3 oz) regular Oreo cookies
-
02
1 package (8 oz) full-fat cream cheese, softened to room temperature
For the Coating
-
01
2 cups (12 oz) semi-sweet chocolate chips
-
02
1 teaspoon vegetable shortening
-
03
Sprinkles, for decoration (optional)
Instructions
Place the entire package of Oreo cookies (creams included) into a food processor. Pulse until they become fine, even crumbs. You can also place them in a sturdy zip-top bag and crush them with a rolling pin, but the food processor is much easier, honestly.
In a large mixing bowl, combine the fine Oreo crumbs with the softened cream cheese. Use a hand mixer or a sturdy spatula to mix until it's completely combined and looks like a thick, uniform dough. It will be very sticky.
Cover the bowl and refrigerate the mixture for at least 1 hour. This is so important—it firms up the dough and makes it possible to roll into neat balls without sticking everywhere. Overnight is even better if you have the time.
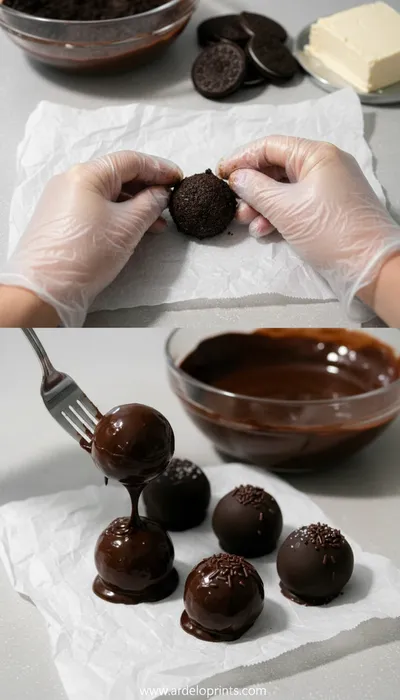
Once chilled, use a small cookie scoop or a tablespoon to portion out the mixture. Roll each portion between your palms to form a smooth, firm ball. Place the balls on a baking sheet lined with parchment paper. If your hands get sticky, dampen them slightly with water.
Place the baking sheet with the rolled balls into the freezer for about she’s a solid 15-20 minutes. This final chill ensures they won't melt when you dip them in the warm chocolate.
While the balls are chilling, melt the chocolate. Combine the chocolate chips and shortening in a microwave-safe bowl. Heat on 50% power in 30-second intervals, stirring thoroughly after each, until smooth and fluid. Alternatively, use a double boiler.
Remove a few balls from the freezer at a time. Using a fork or a dipping tool, submerge each ball in the melted chocolate, tapping the fork gently on the edge of the bowl to let the excess drip off.
Place the dipped ball back onto the parchment-lined sheet. If using sprinkles, add them immediately before the chocolate sets. Repeat with all the balls, reheating the chocolate gently if it starts to thicken.
Let the chocolate coating set completely at room temperature, or pop the tray back in the fridge for 10 minutes to speed it up. Once set, they're ready to serve! Store any leftovers in an airtight container in the refrigerator.
Notes & Tips
-
1
For a different twist, try using mint or peanut butter Oreos.
-
2
If you don't have a food processor, a blender or a lot of elbow grease with a rolling pin will work.
-
3
These are perfect for gifting! Package them in a cute box or tin.
-
4
White chocolate coating is a delicious alternative to dark chocolate.
 Desserts
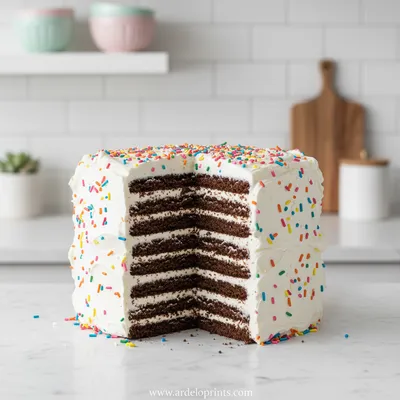
Easy Ice Cream Sandwich Cake
Cool, creamy ice cream sandwich cake that's simple, fun, and perfect for any sweet craving.
Tools You'll Need
-
Food processor or rolling pin and zip-top bag
-
Large mixing bowl
-
Hand mixer or sturdy spatula
-
Baking sheets
-
Parchment paper
-
Microwave-safe bowl or double boiler
-
Fork or dipping tool
Must-Know Tips
-
Don't skip the chilling, Chilling the mixture and the rolled balls is essential for success.
-
Use room temp cream cheese, Cold cream cheese won't mix in smoothly and will create lumps.
-
Tap off excess chocolate, This gives you a thin, professional-looking coating instead of a thick, clunky one.
Professional Secrets
-
A pinch of salt, Adding a tiny pinch of salt to the chocolate coating can really make the flavor pop.
-
Freeze for dipping, The frozen balls help the chocolate set almost instantly for a smooth finish.
-
Sift crumbs, For an ultra-smooth texture, you can sift the Oreo crumbs after processing to remove any larger bits.

Recipe by
Mason Cole“Sweet cravings are my specialty! I turn sugar, chocolate, and imagination into pure dessert magic.” 🍰✨
Get Delicious Recipes Weekly
Join 25,000+ home cooks getting our best recipes straight to their inbox.
Free forever • No spam • Unsubscribe anytime