The concept of protein brownies emerged from the fitness community's desire for healthier dessert alternatives that still delivered on flavor and texture. Early versions were often dry and chalky, but over time, home cooks perfected the balance between nutrition and indulgence. The single-serving microwave method revolutionized quick healthy treats, making it possible to satisfy chocolate cravings in minutes rather than hours. This recipe represents years of refinement to achieve that perfect moist, fudgy texture that makes you forget it's actually good for you.
Why You'll Love It
-
- Ready in just one minute - faster than ordering dessert
-
- Packed with protein to keep you satisfied longer
-
- Deep chocolate flavor without the sugar crash
-
- Perfect portion control - no giant pan tempting you
"I make these almost daily now - they're the perfect afternoon pick-me-up that doesn't ruin my healthy eating goals."
Essential Ingredient Guide
- Chocolate protein powder: Use a high-quality whey or plant-based protein powder that you enjoy drinking - it makes all the difference in flavor. I find the chocolate-cake flavored ones work beautifully here.
- Cocoa powder: The real chocolate depth comes from unsweetened cocoa powder. Dutch-processed gives a smoother flavor, but any good quality cocoa will work wonders.
- Greek yogurt: This adds incredible moisture and protein. Full-fat gives the richest texture, but any percentage works. The tanginess balances the sweetness perfectly.
- Egg: Just one egg binds everything together and creates that lovely cake-like structure. Room temperature blends best, but cold works fine too.
- Maple syrup: A touch of natural sweetness that complements the chocolate. You can adjust to your taste - I use just enough to enhance without overpowering.
- Baking powder: That little lift makes the difference between dense fudge and brownie perfection. Just a pinch does the trick.
 International_Cuisine
Spicy Shrimp Sushi Stacks
A fresh, vibrant bite combining seasoned shrimp, rice, and crisp toppings.
Complete Cooking Process
-
Ingredient Readiness:
Having everything measured and ready makes the minute count. The yogurt should be stirred, egg cracked, and dry ingredients whisked together. That way, when the craving hits, you're not scrambling.
-
Flavor Development:
The magic happens when you mix the wet and dry ingredients gently - overmixing can make it tough. The cocoa blooms beautifully with the moisture, releasing that deep chocolate aroma that fills your kitchen.
-
Texture Control:
The microwave cooking is quick but precise. Thirty seconds might give you molten center, forty-five gives you cake-like texture. Finding your perfect timing is part of the fun, honestly.
-
Finishing Touches:
Letting it rest for a minute after cooking is crucial. The heat continues working, settling the structure. Then a sprinkle of sea salt or some berries on top - wow, just perfect.
-
Serving Timing:
Best served warm when the chocolate is still slightly melty. It's the kind of comfort that feels like a hug, especially on busy days when you need a little pick-me-up.
-
Use a microwave-safe mug or small bowl - ceramic works best for even cooking
-
Don't overmix the batter - a few lumps are better than tough brownies
-
Check at 30 seconds - microwaves vary widely in power
-
Let it cool slightly before eating - it sets up perfectly
Pro Tips
I remember when I first tried this recipe, I was skeptical that something so quick could be so satisfying. But that first warm, chocolatey bite won me over completely. Now I keep the ingredients measured in little containers, ready for when that afternoon slump hits.
It's become my little secret weapon for busy days. When the kids are doing homework or I'm between work calls, this single-serving treat feels like a proper break without derailing my healthy eating. The protein keeps me going, and the chocolate... well, the chocolate just makes everything better.
 Dinner
Creamy Low Carb Chicken Casserole
Low‑carb, creamy chicken casserole that feels indulgent without the noodles.

The essence of the dish:
This isn't just a brownie - it's a moment of pure comfort that respects your health goals. The combination of rich chocolate flavor with satisfying protein creates something truly special that feels indulgent without the guilt.
A fun fact or historical angle:
Microwave mug cakes became popular in the early 2000s, but protein versions emerged as fitness enthusiasts sought healthier alternatives to traditional desserts. This recipe represents the perfect marriage of convenience and nutrition.
Flavor or sensory focus:
The first thing you'll notice is the warm chocolate aroma that fills the air. Then that first bite - slightly crisp on top, incredibly moist inside, with deep cocoa notes that linger pleasantly.
You Must Know
-
Microwave power varies - start with less time and add if needed
-
The brownie continues cooking after removal - don't over-microwave
-
Quality protein powder makes all the difference in flavor
-
Let it cool slightly for the best texture experience
Frequently Asked Questions
→ Can I make this without a microwave?
Absolutely! Bake at 350°F (175°C) in a small oven-safe dish for about 12-15 minutes. The texture will be slightly different but still delicious.
→ What's the best protein powder to use?
Use one you already enjoy drinking. Whey protein creates a lighter texture, while plant-based powders might be denser. Chocolate cake or double chocolate flavors work beautifully.
→ Can I make these ahead of time?
They're best fresh, but you can mix the dry ingredients in advance and store them. When ready, just add the wet ingredients and microwave.
→ How do I prevent it from becoming rubbery?
Don't overmix the batter and don't overcook it. Thirty to forty-five seconds is usually perfect for a standard microwave.
→ Can I double the recipe?
Yes, but use a larger microwave-safe bowl and increase cooking time to about 1 minute 15 seconds, checking frequently.
→ What makes it fudgy rather than cakey?
The ratio of wet to dry ingredients and minimal mixing creates that dense, fudgy texture we love in brownies.
Nutrition Facts
per serving
285
Calories
28g
Protein
18g
Carbs
9g
Fat
Taste Profile
Rich chocolate flavor with balanced sweetness and subtle protein notes
Ingredient Substitutions
Don't have an ingredient? Try these alternatives
Will change moisture content slightly - adjust cooking time if needed
Flavor will be slightly different but equally delicious
Let sit for 5 minutes to thicken before using
Recipe Variations
Try these delicious twists on the original
Peanut Butter Swirl
Add a tablespoon of peanut butter swirled through the batter before microwaving
Mint Chocolate
Use mint chocolate protein powder or add 1/4 teaspoon peppermint extract
Rocky Road
Add mini marshmallows and chopped almonds along with chocolate chips
Common Mistakes to Avoid
Learn from others' mistakes for perfect results
- Overmixing the batter - creates tough texture
- Overcooking in microwave - becomes dry and rubbery
- Using cold ingredients straight from fridge - doesn't mix as well
- Not letting it rest after cooking - needs time to set
Meal Prep & Storage
Make Ahead Tips
You can mix the dry ingredients in advance and store in an airtight container. When ready, just add the wet ingredients and microwave.
Leftover Ideas
Best enjoyed immediately. If you must save it, store covered in the refrigerator and reheat gently in the microwave for 15-20 seconds.
Perfect Pairings
Serve this with...
Cooking Timeline
Measure and mix dry ingredients in microwave-safe mug
Add wet ingredients and mix gently until just combined
Microwave for 30-45 seconds, then let rest for 1 minute
Add toppings if desired and enjoy warm
 Snacks
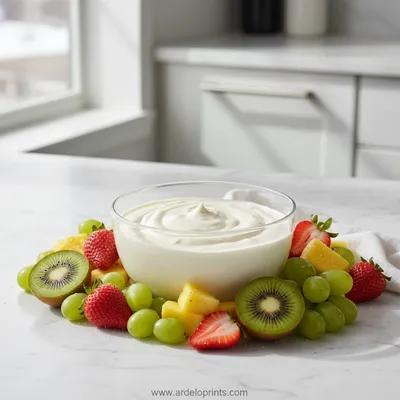
Easy Fruit Dip Recipe
Creamy, easy fruit dip for fresh fruit, perfect for any snack or dessert.

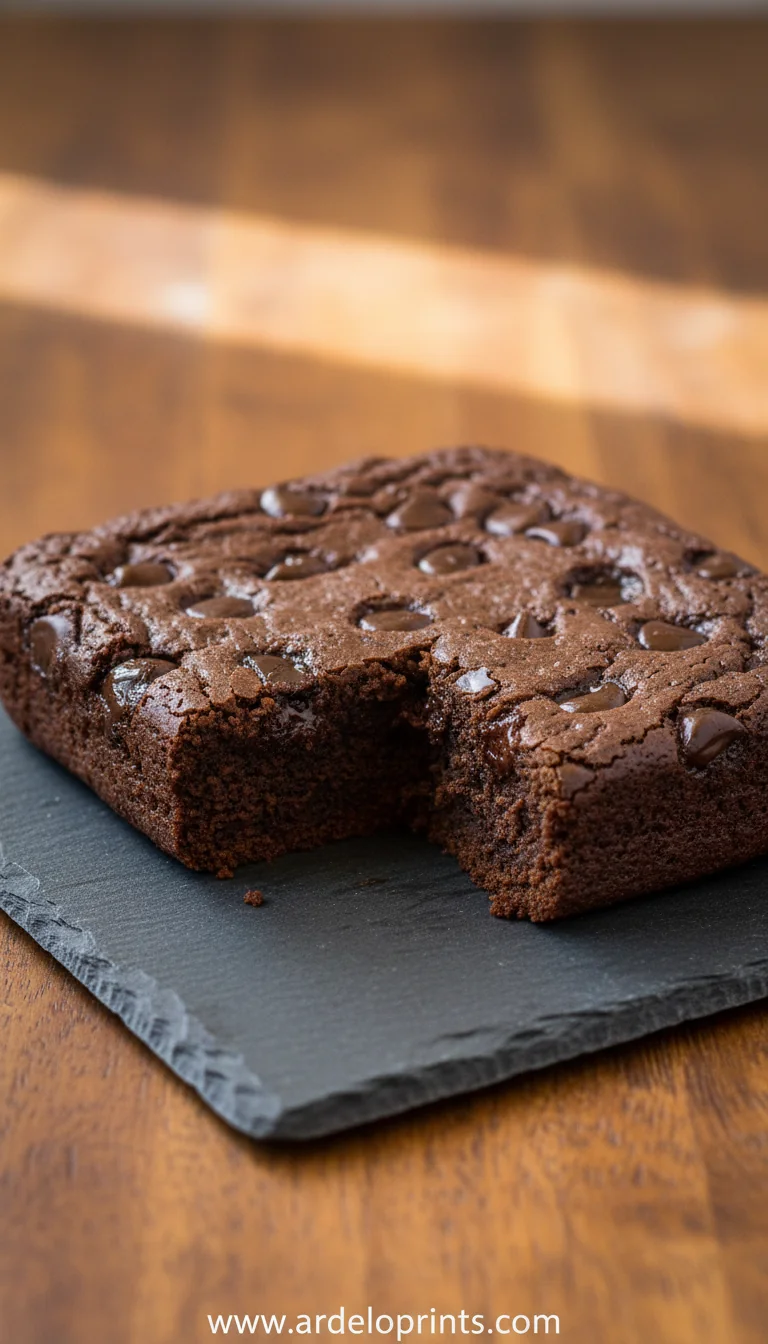
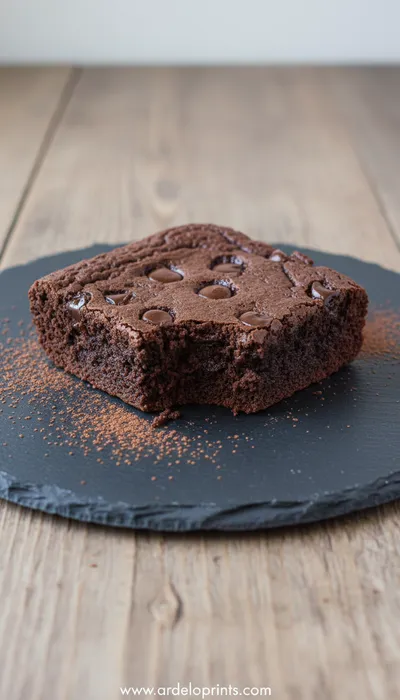
Protein Brownie Recipe: Moist and Fudgy
Make this delicious protein brownie in just 1 minute - moist, fudgy, and gooey perfection for a healthy snack or dessert. Honestly, it's the kind of treat that feels indulgent but doesn't weigh you down, which is exactly what I need most afternoons.
Timing
Prep Time
2 Minutes
Cook Time
1 Minute
Total Time
3 Minutes
Recipe Details
Ingredients
Dry Ingredients
-
01
3 tablespoons chocolate protein powder
-
02
1 tablespoon cocoa powder
-
03
1/4 teaspoon baking powder
-
04
Pinch of salt
Wet Ingredients
-
01
2 tablespoons Greek yogurt
-
02
1 large egg
-
03
1 tablespoon maple syrup
-
04
1/2 teaspoon vanilla extract
Optional Add-ins
-
01
1 tablespoon chocolate chips
-
02
1 tablespoon chopped nuts
-
03
1 teaspoon instant coffee for depth
Instructions
In a small microwave-safe mug or bowl, whisk together the dry ingredients - protein powder, cocoa powder, baking powder, and salt. Make sure there are no lumps.
Add the wet ingredients - Greek yogurt, egg, maple syrup, and vanilla extract. Gently stir until just combined. Don't overmix - a few lumps are fine. Fold in any add-ins if using.
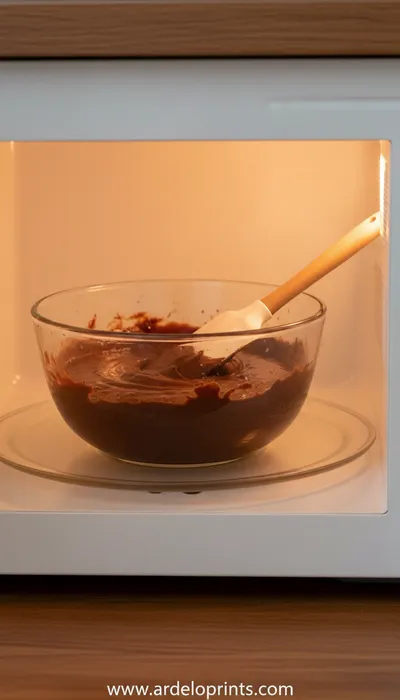
Microwave on high for 30-45 seconds. Start with 30 seconds and check - the top should look set but still moist. If needed, add 10-15 seconds more. Remember, microwaves vary in power.
Let it rest for 1 minute after microwaving. The brownie will continue cooking from residual heat. Sprinkle with sea salt or top with berries if desired, and enjoy warm.
For extra indulgence, you could serve it with a dollop of whipped cream or a scoop of vanilla protein ice cream. Honestly, sometimes I just eat it straight from the mug with a spoon - no fancy presentation needed.
Notes & Tips
-
1
The brownie will be very hot immediately after microwaving - let it cool for a minute before eating
-
2
If it seems undercooked, microwave in 10-second increments until done
-
3
Store any leftover batter in the refrigerator for up to 24 hours
-
4
For a richer flavor, use dark cocoa powder instead of regular
 Desserts
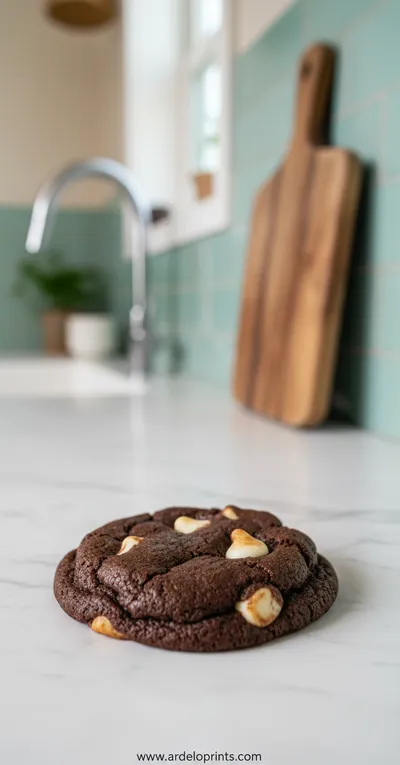
Inside Out Chocolate Chip Cookies
Chewy cookies with crisp edges and a melt‑in‑your‑mouth center.
Tools You'll Need
-
Microwave-safe mug or small bowl
-
Small whisk or fork
-
Measuring spoons
-
Spatula for mixing
Must-Know Tips
-
Don't overmix the batter - gentle stirring preserves the fudgy texture
-
Use room temperature ingredients for even mixing
-
Test your microwave timing - start low and add time as needed
-
Let it rest after cooking - this completes the cooking process
Professional Secrets
-
Room temperature egg blends more smoothly with other ingredients
-
A pinch of instant coffee enhances chocolate flavor without tasting like coffee
-
Lightly oiling the mug helps with easy removal if desired

Recipe by
Mason Cole“Sweet cravings are my specialty! I turn sugar, chocolate, and imagination into pure dessert magic.” 🍰✨
Get Delicious Recipes Weekly
Join 25,000+ home cooks getting our best recipes straight to their inbox.
Free forever • No spam • Unsubscribe anytime